Integrating XBlocks with edx-platform#
The Open edX LMS and Studio have several features that are extensions of the core XBlock libraries (Open edX XBlock Tutorial and Open edX XBlock API Guide). These features are listed below.
LMS#
Runtime Features#
These are properties and methods available on self.runtime when a view or
handler is executed by the LMS.
anonymous_student_id: An identifier unique to the student in the particular course that the block is being executed in. The same student in two different courses will have two different ids.publish(block, event_type, event): Emit events to the surrounding system. Events are dictionaries that can contain arbitrary data. XBlocks can publish events by callingself.runtime.publish(self, event_type, event). Theevent_typeparameter enables downstream processing of the event since it uniquely identifies the schema. This call will cause the runtime to save the event data in the application event stream. XBlocks should publish events whenever a significant state change occurs. Post-hoc analysis of the event stream can yield insight about how the XBlock is used in the context of the application. Ideally interesting state of the XBlock could be reconstructed at any point in history through careful analysis of the event stream.
See more about event types in XBlocks, Events, and Grading.
In the future, these are likely to become more formal XBlock services (one related to users, and the other to event publishing).
Class Features#
These are class attributes or functions that can be provided by an XBlock to customize behavior in the LMS.
student_view(XBlock view): This is the view that will be rendered to display the XBlock in the LMS. It will also be used to render the block in “preview” mode in Studio, unless the XBlock also implements author_view.has_score(class property): True if this block should appear in the LMS progress page.get_progress(method): See documentation in x_module.py:XModuleMixin.get_progress and also see documentation on the Progress class.icon_class(class property): This can be one of (other,video, orproblem), and determines which icon appears in Open edX sequence headers. There is currently no way to provide a different icon.
Grading#
To participate in the course grade, an XBlock should set has_score to
True, and should publish a grade event whenever the grade changes.
The grade event is a dictionary of the following form.
{
    'value': <number>,
    'max_value': <number>,
    'user_id': <number>,
}
The grade event represents a grade of value/max_value for the current user.
The user_id field is optional, the currently logged in user’s ID will be
used if it is omitted.
Restrictions#
A block cannot modify the value of any field with a scope where the user
property is UserScope.NONE.
Studio#
Class Features#
studio_view(XBlock.view): The view used to render an editor in Studio. The editor rendering can be completely different from the LMS student_view, and it is only shown when the author selects “Edit”.author_view(XBlock.view): An optional view of the XBlock similar to student_view, but with possible inline editing capabilities. This view differs fromstudio_viewin that it should be as similar tostudent_viewas possible. When previewing XBlocks within Studio, Studio will preferauthor_viewtostudent_view.non_editable_metadata_fields(property): A list ofxblock.fields.Fieldobjects that should not be displayed in the default editing view for Studio.
Restrictions#
A block cannot modify the value of any field with a scope where the user
property is not UserScope.NONE.
Testing#
To enable an XBlock for testing in Tutor, follow the instructions to install an XBlock in development mode.
Add the block to your courses’ advanced settings in Studio.
Log in to Studio, and open your course
Settings -> Advanced Settings
Change the value for the key
"advanced_modules"to["your-block"]
Add your block into your course.
Edit a unit
Advanced -> your-block
Note the name your-block used in Studio must exactly match the key you used
to add your block to your setup.py entry_points list. (If you are still
discovering XBlocks and simply used the workbench-make-new.py script as
described in the Open edX XBlock Tutorial, look in the
setup.py file that was created.)
Deploying Your XBlock#
To deploy your block to your own hosted version of edx-platform, follow the instructions to deploy XBlocks on Tutor.
Rendering XBlocks with the XBlock URL#
The XBlock URL supports HTML rendering of an individual XBlock without the user interface of the LMS.
To use the XBlock URL and return the HTML rendering of an individual XBlock, you use the following URL path for an XBlock on an Open edX site.
https://{host}/xblock/{usage_id}
Finding the usage_id#
The usage_id is the unique identifier for the problem, video, text, or
other course content component, or for sequential or vertical course container
component. There are several ways to find the usage_id for an XBlock in the
LMS, including viewing either the staff debug info or the page source. For more
information, see
Determine LTI Content Addresses.
Example XBlock URLs#
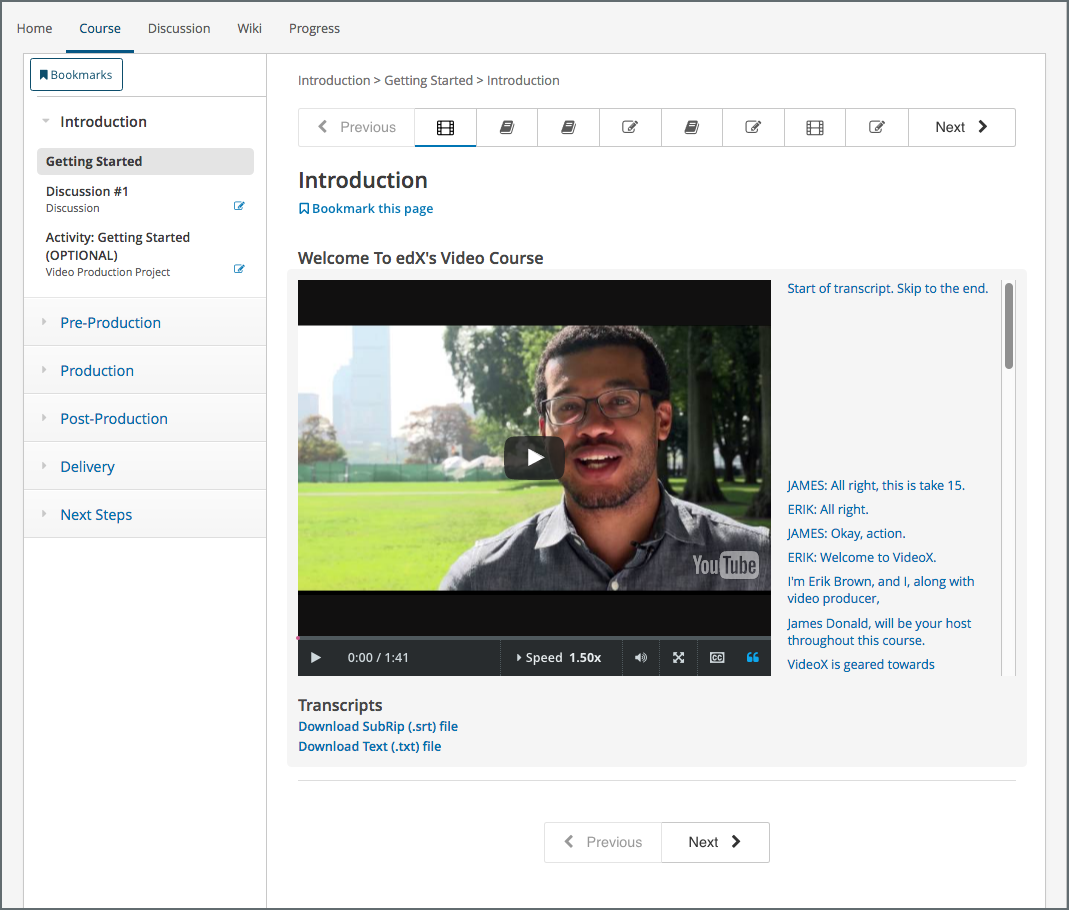
For example, a video component in the “Creating Video for the edX Platform” course on the edx.org site has the following URL:
This video component appears as follows in the LMS.
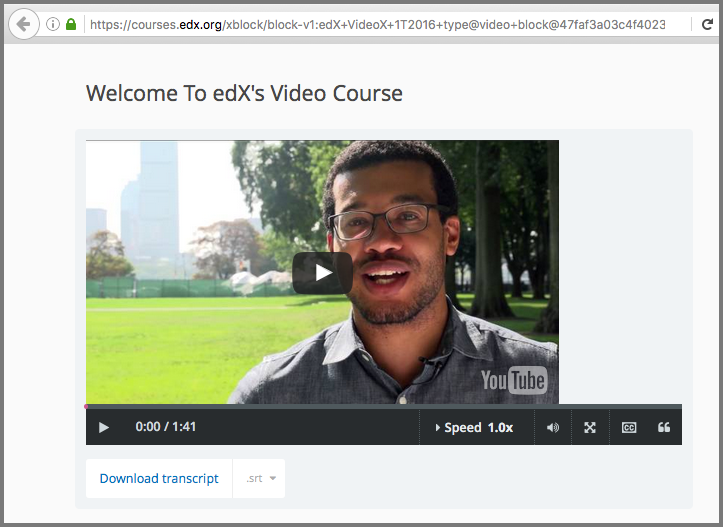
To construct the XBlock URL for the same video component, you obtain its
usage_id and then use the following URL format:
When you use this URL, the video component appears in your browser as follows.
For courses created prior to October 2014, the usage_id begins with
i4x://, as in the following example:
Maintenance chart
Review Date |
Working Group Reviewer |
Release |
Test situation |