Add New Documentation via GitHub#
Note
These instructions are for adding new documentation directly on GitHub. You can create documentation on your computer then synch it to GitHub, if you are familiar with the GitHub client software.
Prerequisite
You need a GitHub account to create or edit documentation. You can create a free Github account here.
AI Policy#
Please review the Open edX AI Policy prior to developing documentation with AI assistance.
1. Find Where To Add a New Document#
The latest documentation is in the main branch of the Open edX Documentation GitHub repository.
Review the Documentation Audiences and About Open edX® Documentation Standards sections to determine where you addition should be located.
Navigate to the folder where you want to create the new document.
Ensure the main branch is selected.
In the GitHub repository, click the branch drop-down.
Type the name of the branch, in the form of:
your_github_username-type_of_changeClick Create branch.
The branch you created becomes active; you can now create or edit documentation.
2. Create the New Document#
In some cases (for example, with a brand new feature), you may want to create a new document to describe the feature.
With your new branch active:
Find the location where you should put the new document. Consider the audience and type of topic for the new content.
In the Add New File drop-down, select Create New File. You will see the following screen:
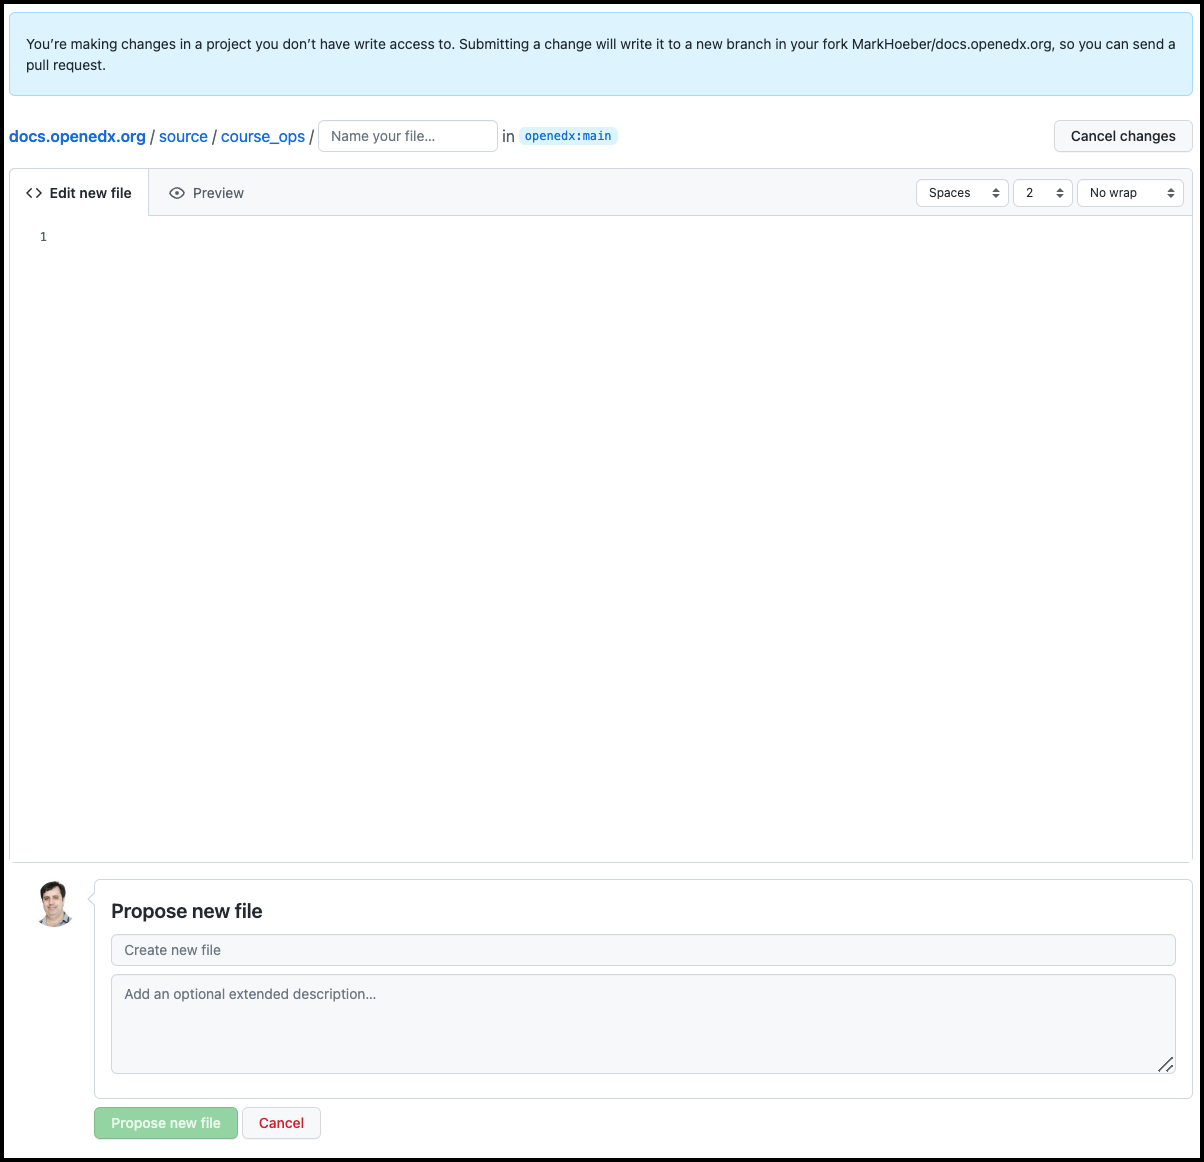
At the top of the screen, give the file a name and the
.rstextension.Add content to the topic as needed.
Ensure you keep to RST standards in file. See the Documentation Checklist for guidelines, and copy RST code as needed from Documentation Templates.
In the Commit Changes section at the bottom of the edit window:
Add a comment about the addition you made.
Choose to commit directly to the branch you created in Step 1.
Click Propose new file to save these changes to your branch.
Repeat these steps for all topics you need to create.
Every new topic must be added to a table of contents. Add each new topic to the audience home page in the appropriate place.
3. Create a Pull Request#
In the Pull Request window, click Create pull request.
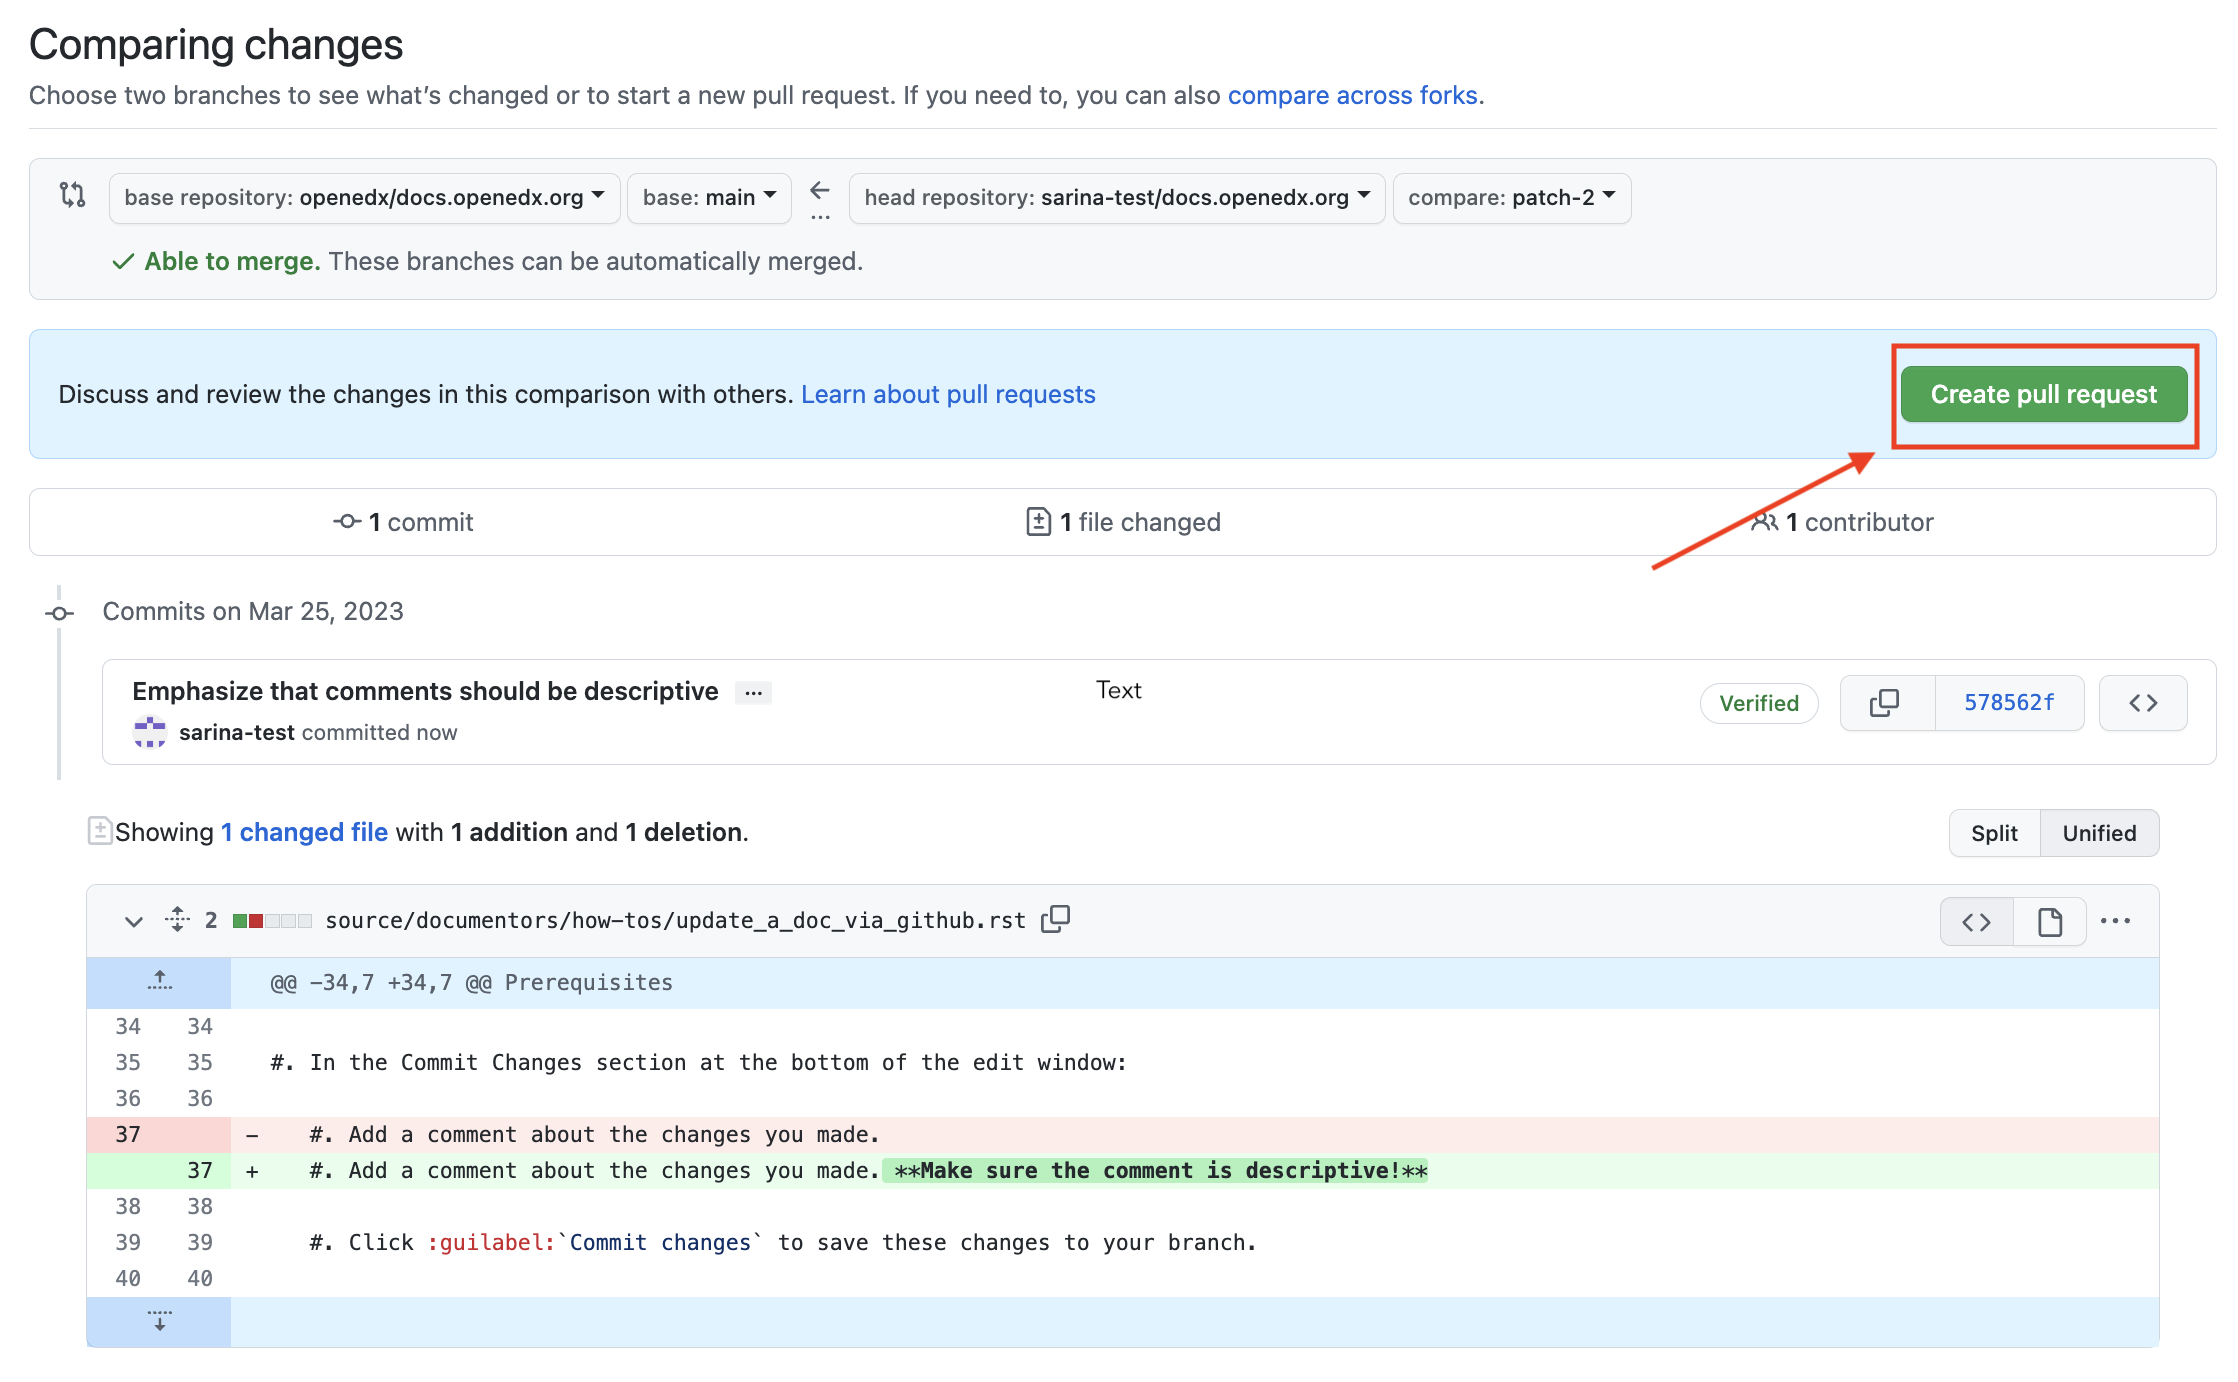
You should not need to change the branches selected. By default, you are requesting to merge the branch in your fork of the repository into the official repository’s main branch.
Add a unique, descriptive title for your pull request.
Add a comment that explains your change to the Open edX team.
Ensure the checkbox “Allow edits by maintainers” - this enables the Open edX team to rerun tests or make small changes, which will decrease the time for your changes to be accepted. Your screen should look like this:
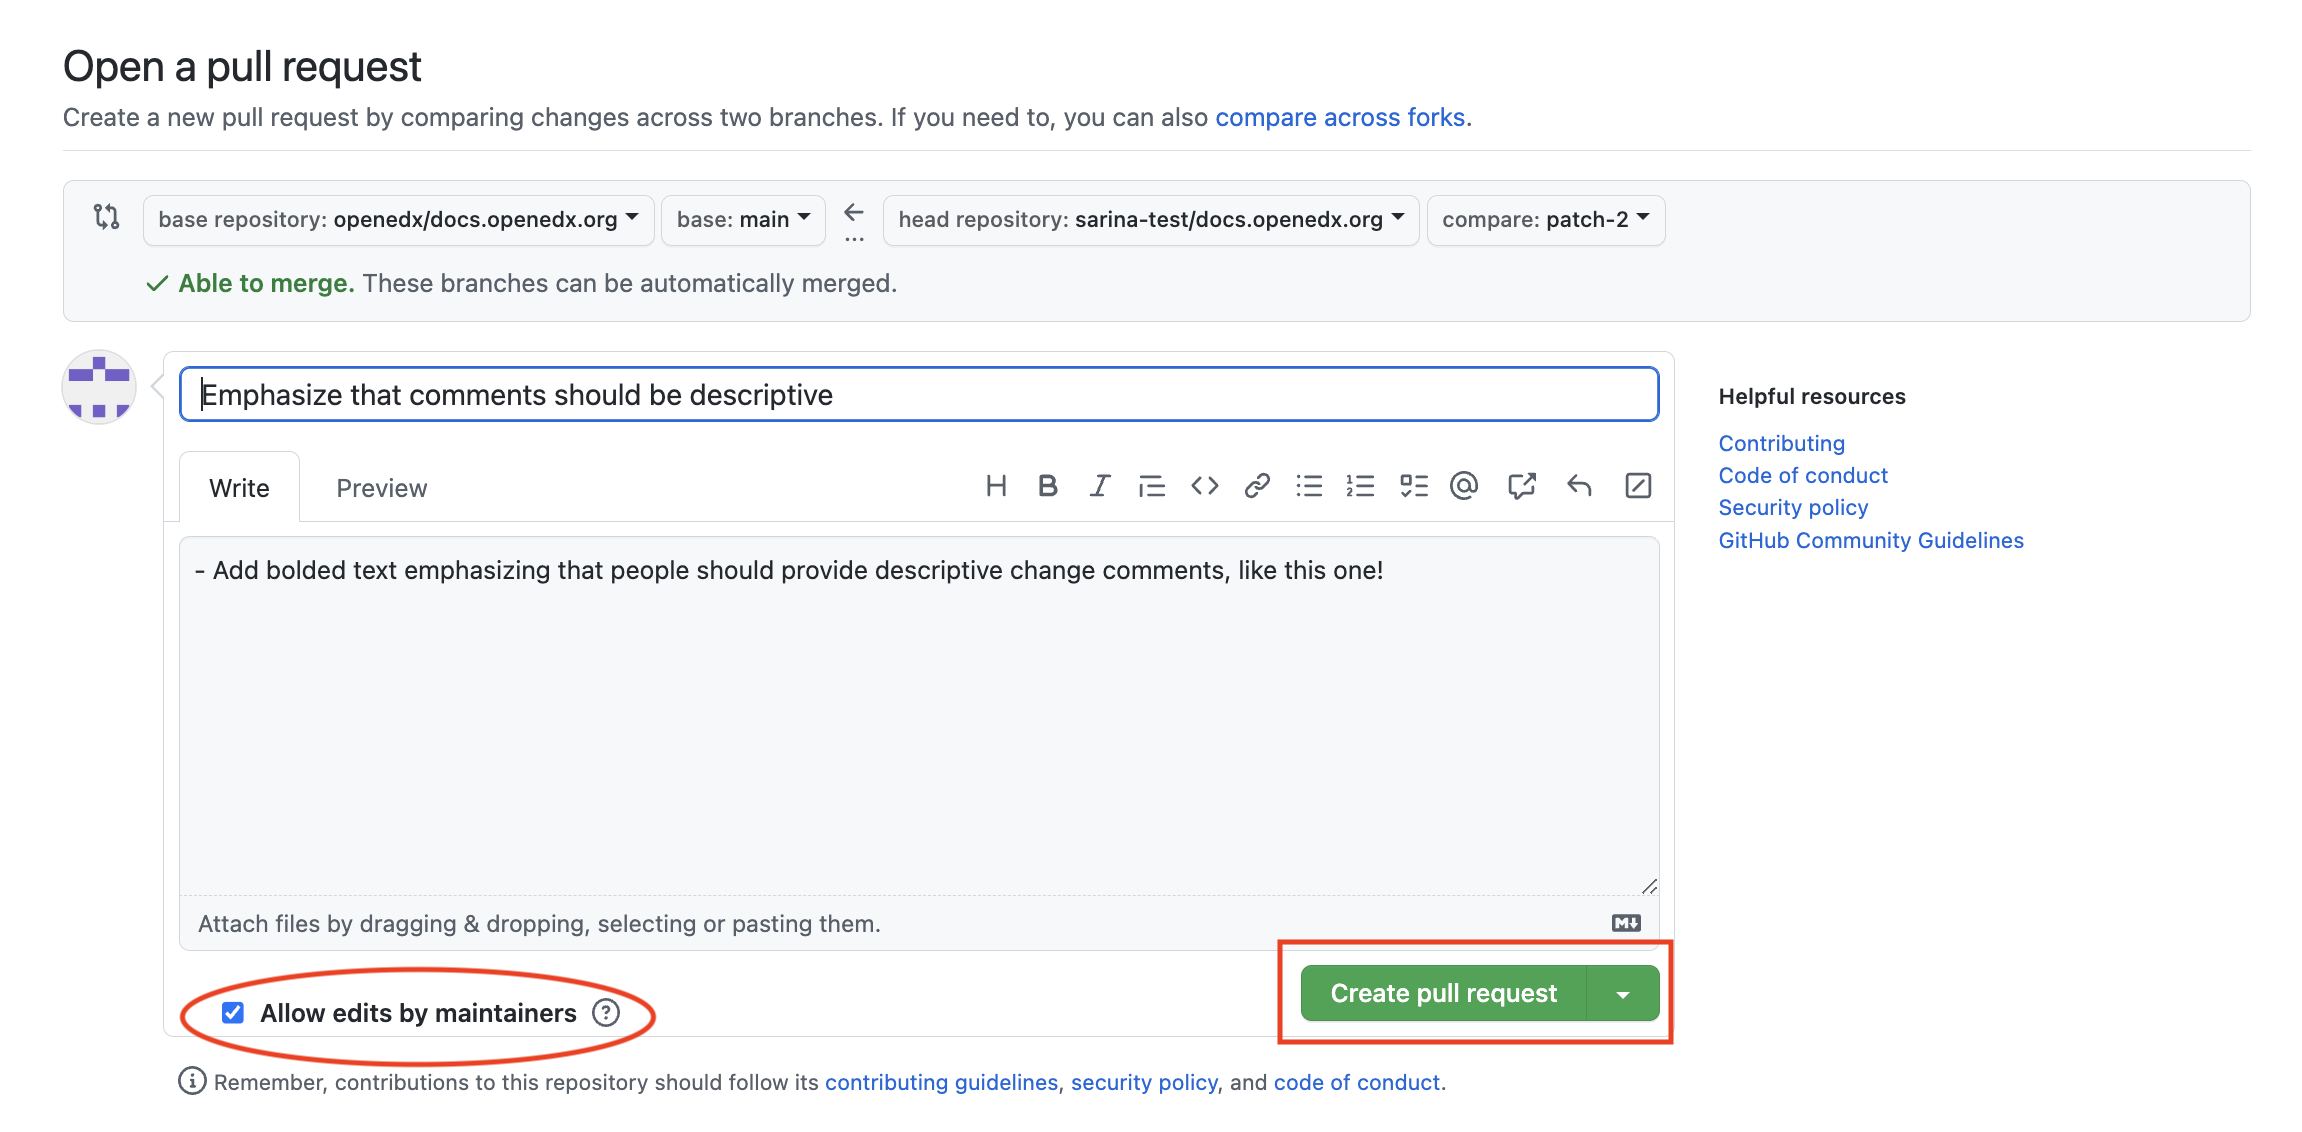
Click Create pull request.
The Open edX team will then review your changes. If they approve, they will merge the pull request, and you will see your changes in the latest documentation. The Open edX team may ask you to make further changes, to clarify the documentation or fix issues.
See also
Update An Existing Doc via GitHub (how-to)
Report a problem with the docs (how-to)
About Open edX® Documentation Standards (concept)
Documentor Guidelines (reference)
Documentation Maintenance Process (reference)
Guidelines for Writing Global English (reference)
Open edX Documentation Writing Style Guide (reference)
Documentation Templates (reference)
Quick Reference: Writing RST and Markdown (reference)
Documentation Audiences (concept)
Overview of Review Process for Community Contributions (reference)
Maintenance chart
Review Date |
Working Group Reviewer |
Release |
Test situation |