Set Up an LTI Component Using a Reusable Configuration#
This document explains how to configure an LTI tool using a reusable LTI configuration created by your site operator in LTI Store. The LTI Consumer XBlock in Studio references that stored configuration by using a Filter key. If a site operator updates the reusable configuration, the change will affect every LTI Consumer XBlock that uses the configuration.
Reusable LTI configurations can be used for both LTI 1.1/1.2 and LTI 1.3 tools.
Note
A reusable configuration can be created and managed only in Django Admin, which is typically accessible to site operators rather than educators. Site operators configure the tool’s connection values, while educators configure component-level options in the LTI Consumer XBlock. Setting up and maintaining the integration can therefore require coordination between educators and site operators.
Before You Start#
Before you configure the tool, ask the tool vendor or review the tool’s documentation for the following information.
Whether the tool or activity returns scores to the Open edX platform.
Whether the tool requires learner information, such as username, full name, or email address.
Also ask your site operator for:
The reusable configuration’s Filter key. A Filter key usually looks like lti_store:reference_tool.
For LTI 1.3, whether the reusable configuration enables Deep Linking, Assignment and Grade Services, or Names and Role Provisioning Services.
For LTI 1.3, whether you should enter a launch URL for this XBlock or use the launch URL stored in the reusable configuration.
Step 1: Add and Configure the LTI Consumer XBlock#

Add the LTI Consumer XBlock from the Advanced component list in the course unit.#
In Studio, open the course unit where you want to add the external tool.
In the Add New Component area, click Advanced.
Select LTI Consumer. Studio adds the LTI Consumer XBlock to the course unit.
Edit the XBlock to configure the tool.
Note
For Teak and later releases, the LTI Consumer component is visible by
default. If you do not see LTI Consumer in Studio, add
"lti_consumer" to the Advanced Module List on the Advanced
Settings page. If the list already includes other tools, separate each
value with a comma.
If both LTI Consumer and the older LTI XBlocks appear in Studio, select LTI Consumer.
Configure the Setup Tab#
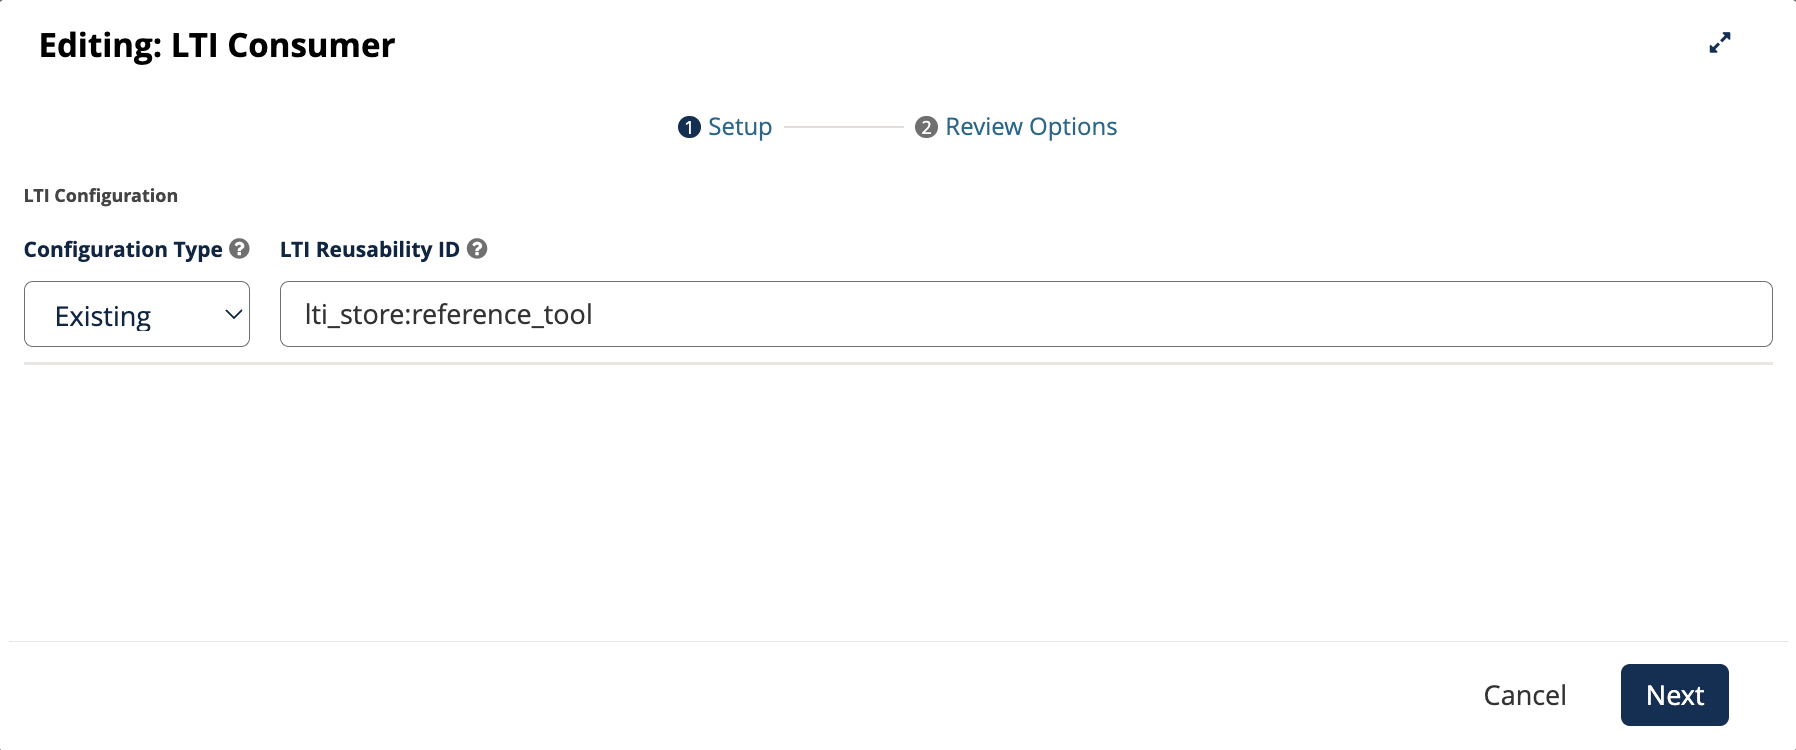
Reference an existing reusable LTI configuration by entering its Filter key.#
On the Setup tab, set Configuration Type to Existing.
In LTI Reusability ID, enter the Filter key provided by your site operator.
Select Next.
Studio retrieves the LTI version and tool connection values from the reusable configuration in LTI Store. The LTI Version and tool credential fields therefore do not appear. For LTI 1.3, the Advantage Settings tab also does not appear because those settings come from the reusable configuration.
For LTI 1.3 reusable configurations, your site operator can enable launch URL overrides. When enabled, the Setup tab includes a Launch URL field. Enter a URL to override the launch URL stored in the reusable configuration. For operator instructions, see Allow Launch URL Override.
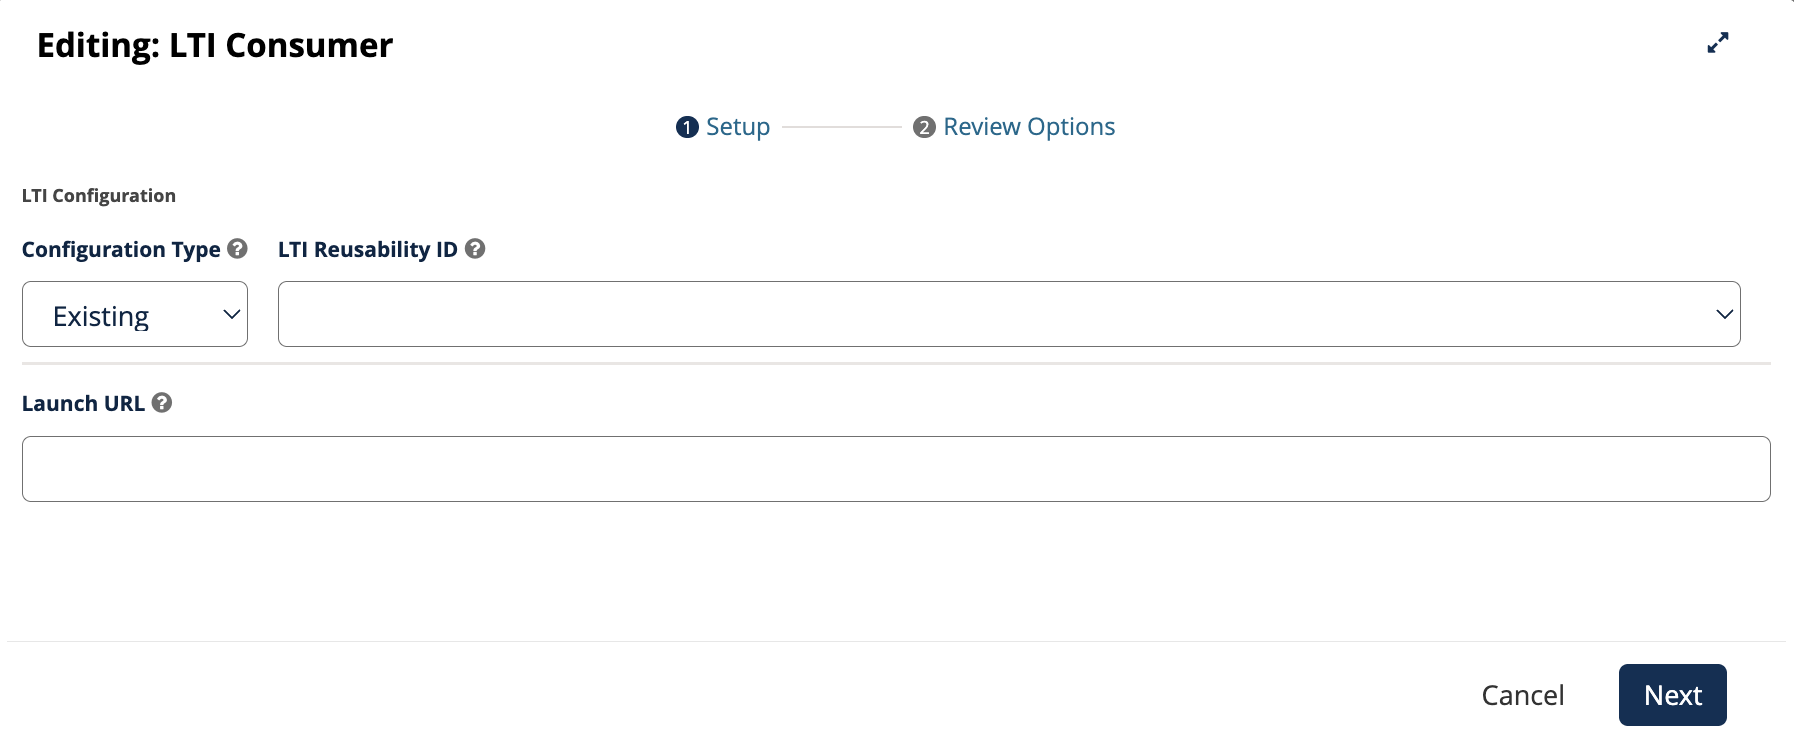
When launch URL override is enabled, use the Launch URL field to override the URL stored in the reusable LTI 1.3 configuration.#
Configure the Review Options Tab#
On the Review Options tab, configure the learner-facing behavior for the LTI component, such as the display name, grading, information sharing, custom parameters, and appearance.
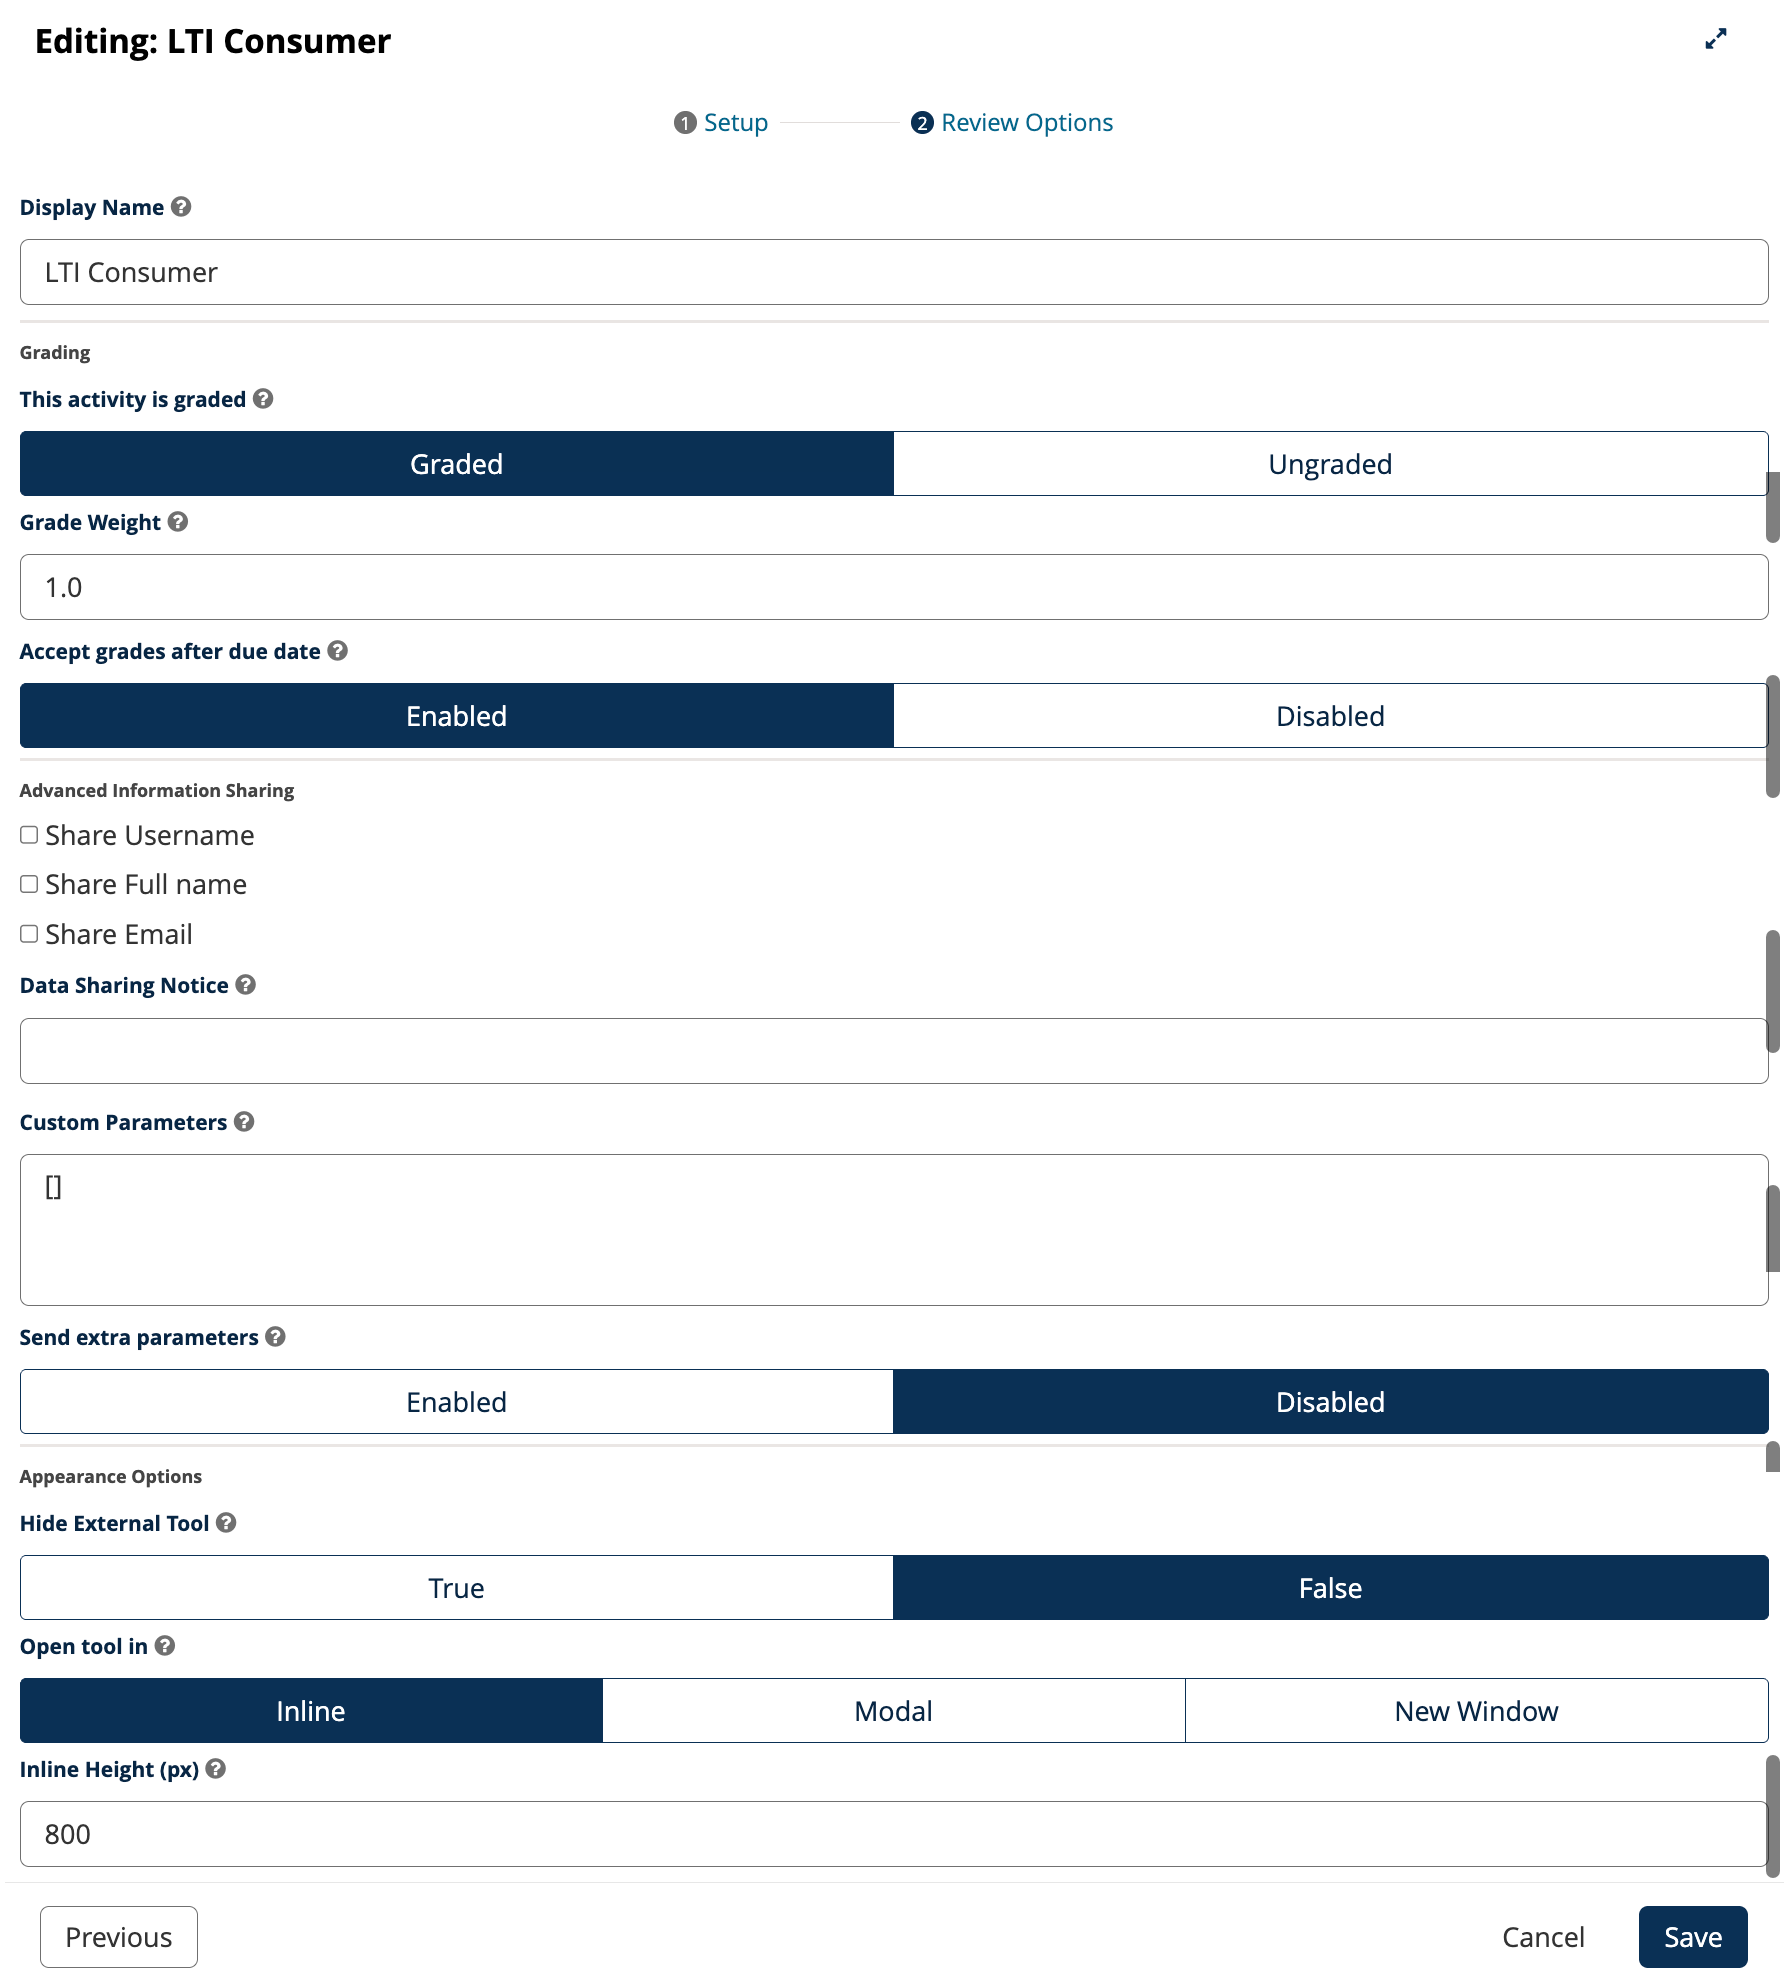
Use the Review Options tab to configure learner-facing settings for the LTI component.#
Configure the Review Options tab as per the following table:
Setting |
Guidance |
|---|---|
Display Name |
Enter a title for this component so users can identify the activity in the course. |
This activity is graded |
Controls whether the component can receive a numerical score from the LTI tool. Set this to Graded if you are expecting the tool to return scores to your Open edX instance. |
Grade Weight |
Sets the number of points possible for the activity. |
Accept grades after due date |
Controls whether the LTI tool can send grades after the due date. |
Share Username, Share Full Name, and Share Email |
These settings control whether the learner’s username, full name, or email address is sent to the tool during LTI launch. They appear only when a site operator has enabled PII sharing for the course. For more information, see Allow Sharing PII to LTI Components. |
Data Sharing Notice |
A notice that appears before launch when any information-sharing setting is enabled. For more information, see Allow Sharing PII to LTI Components. |
Custom Parameters |
Sends custom parameters during tool launch. If the tool requires custom parameters, enter each parameter as
|
Send extra parameters |
Leave this setting unchanged unless the tool’s instructions ask you to change it. |
Hide External Tool |
Controls whether the LTI tool is visible to learners. Set this to True for hidden tool launches, such as launches used only for grade synchronization. Leave this to False to display the tool to learners. |
Open tool in |
Controls how the course page opens and displays the LTI tool. Options include Inline, Modal, and New Window. |
Inline Height (px) |
Sets the height of the inline tool frame in pixels when Open tool in is set to Inline. |
Modal Height (%) |
Sets the height of the modal window as a percentage of the visible browser window height. Appears when Open tool in is set to Modal. |
Modal Width (%) |
Sets the width of the modal window as a percentage of the browser window width. Appears when Open tool in is set to Modal. |
Launch Button Text |
Sets the custom label for the button that opens the LTI tool. Appears when Open tool in is set to Modal or New Window. |
Save |
Click Save to save all configurations. |
Step 2: (For LTI 1.3) Register Your Open edX Instance with the Tool#
LTI 1.3 setup requires registration in both systems. After you save the LTI Consumer XBlock, Studio shows the Open edX instance values that the external tool will need.
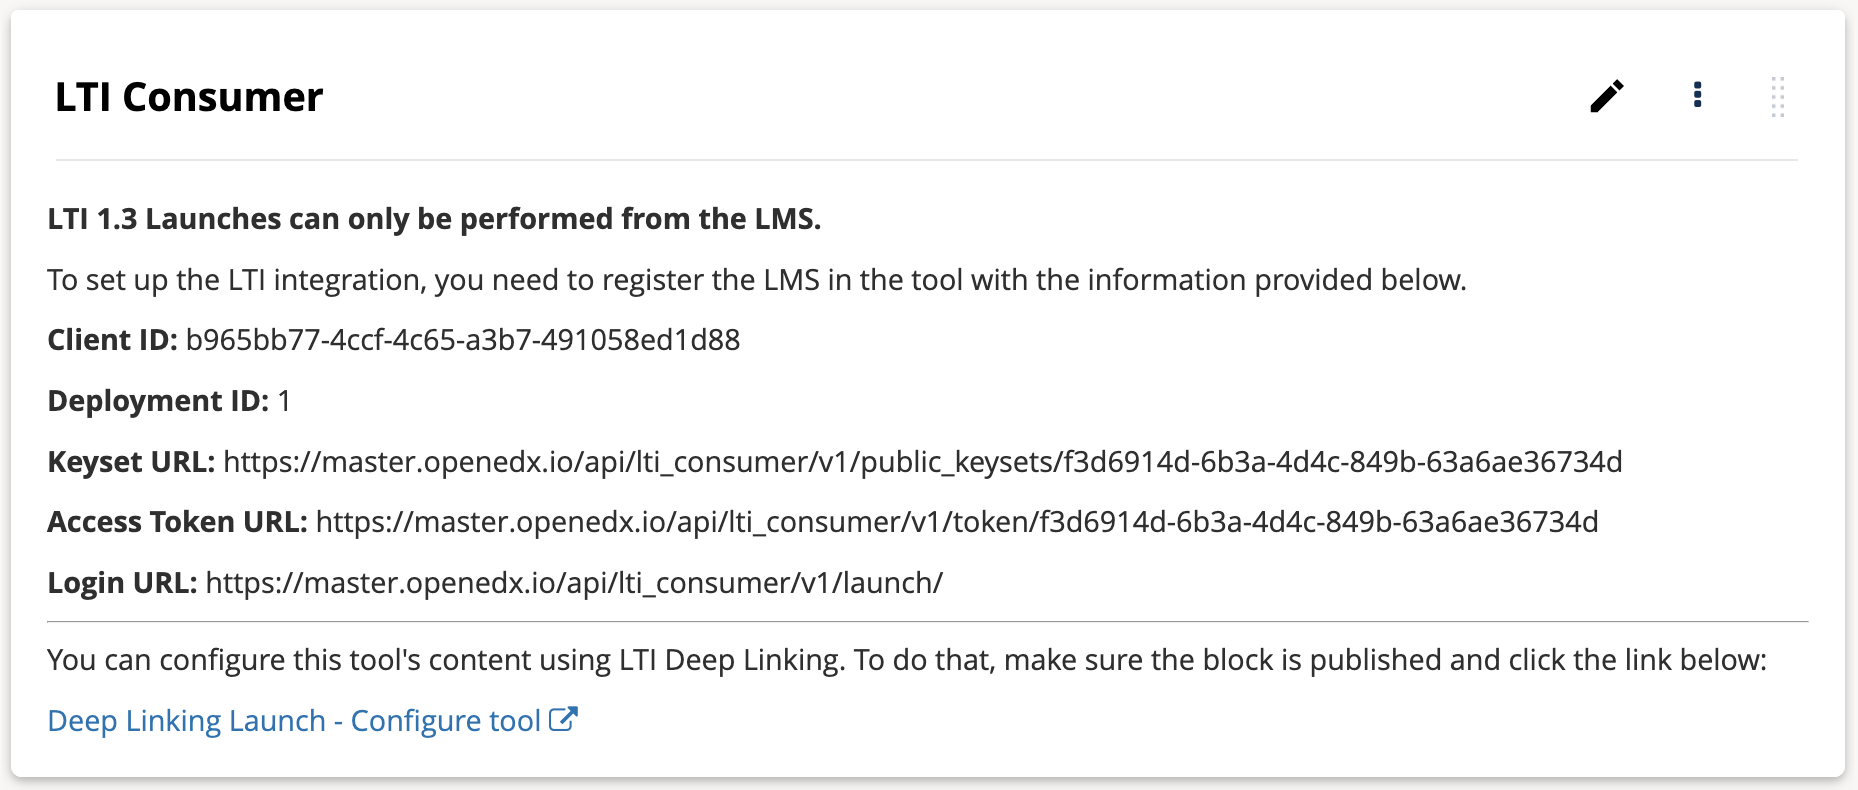
Common Open edX platform values required by LTI 1.3 tools include:
Issuer (your instance domain e.g. https://openedx.io)
Client ID
Deployment ID
Keyset URL
Access Token URL
Login URL
External tools may use different names for these values and may not require all of them. Follow the tool vendor’s instructions.
Step 3: (For LTI 1.3) Use Deep Linking to Select Tool Content#
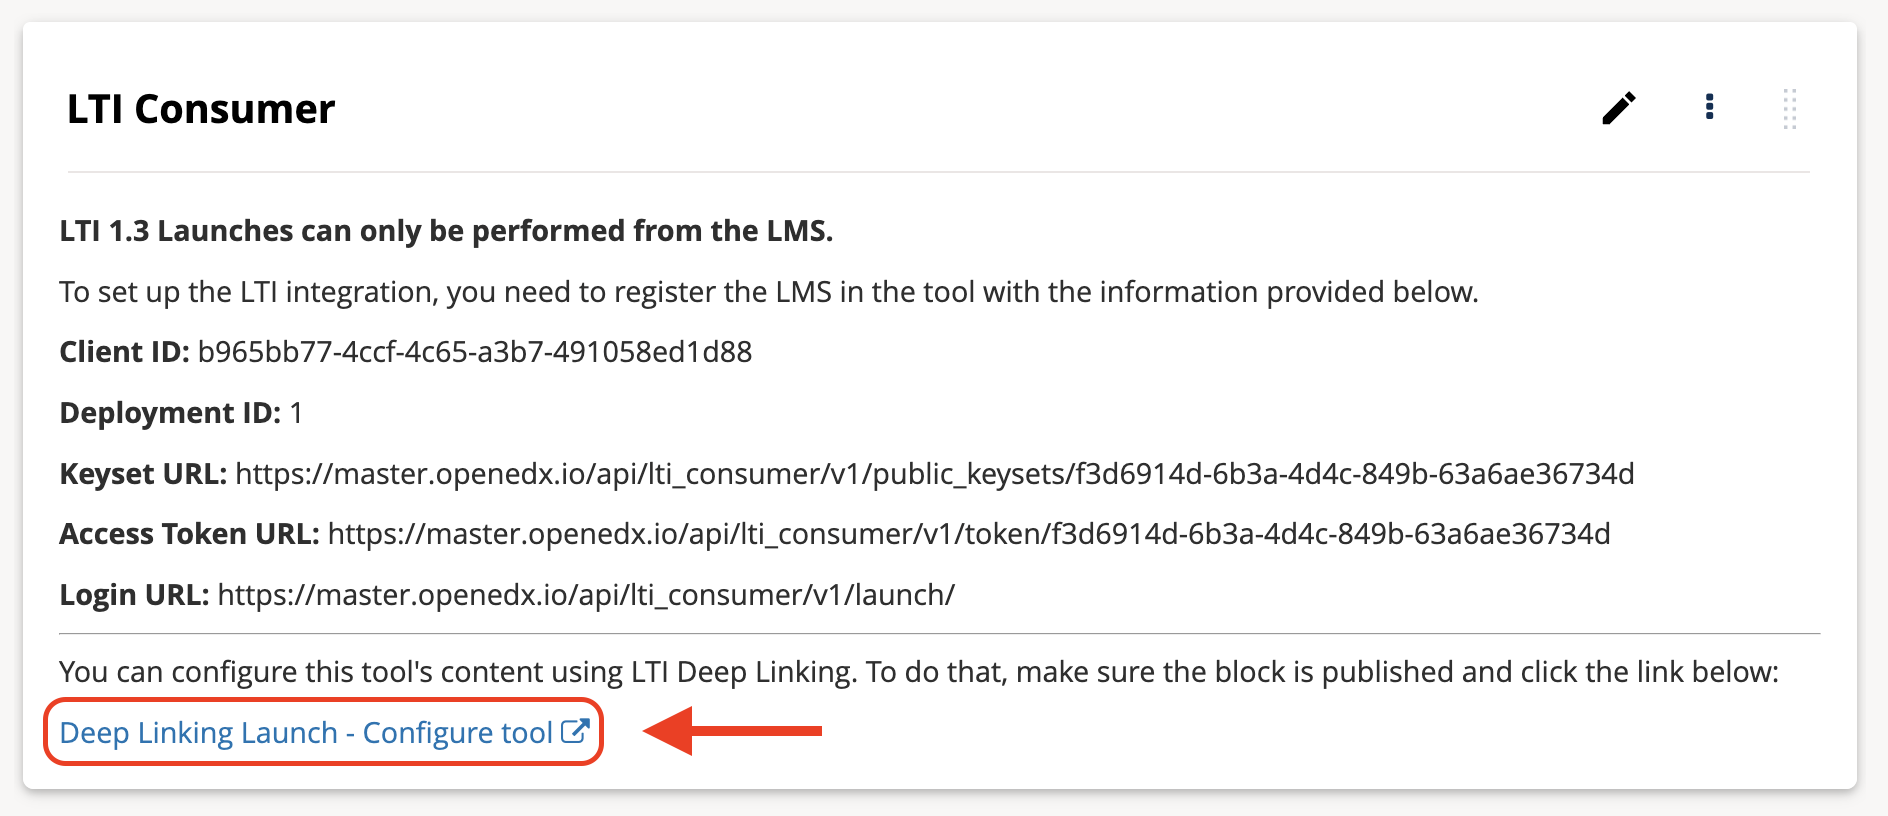
Use the configure tool link to launch the external tool’s content selection workflow.#
If your site operator has enabled Deep linking in the reusable configuration, use these steps to select content:
In Studio, open the unit containing the XBlock you just configured.
Click the Deep Linking Launch - Configure tool link on the XBlock.
Select the content in the external tool.
When the tool redirects back to Studio, confirm that the selected content is configured for the XBlock. Details of the content will appear on the XBlock in Studio.
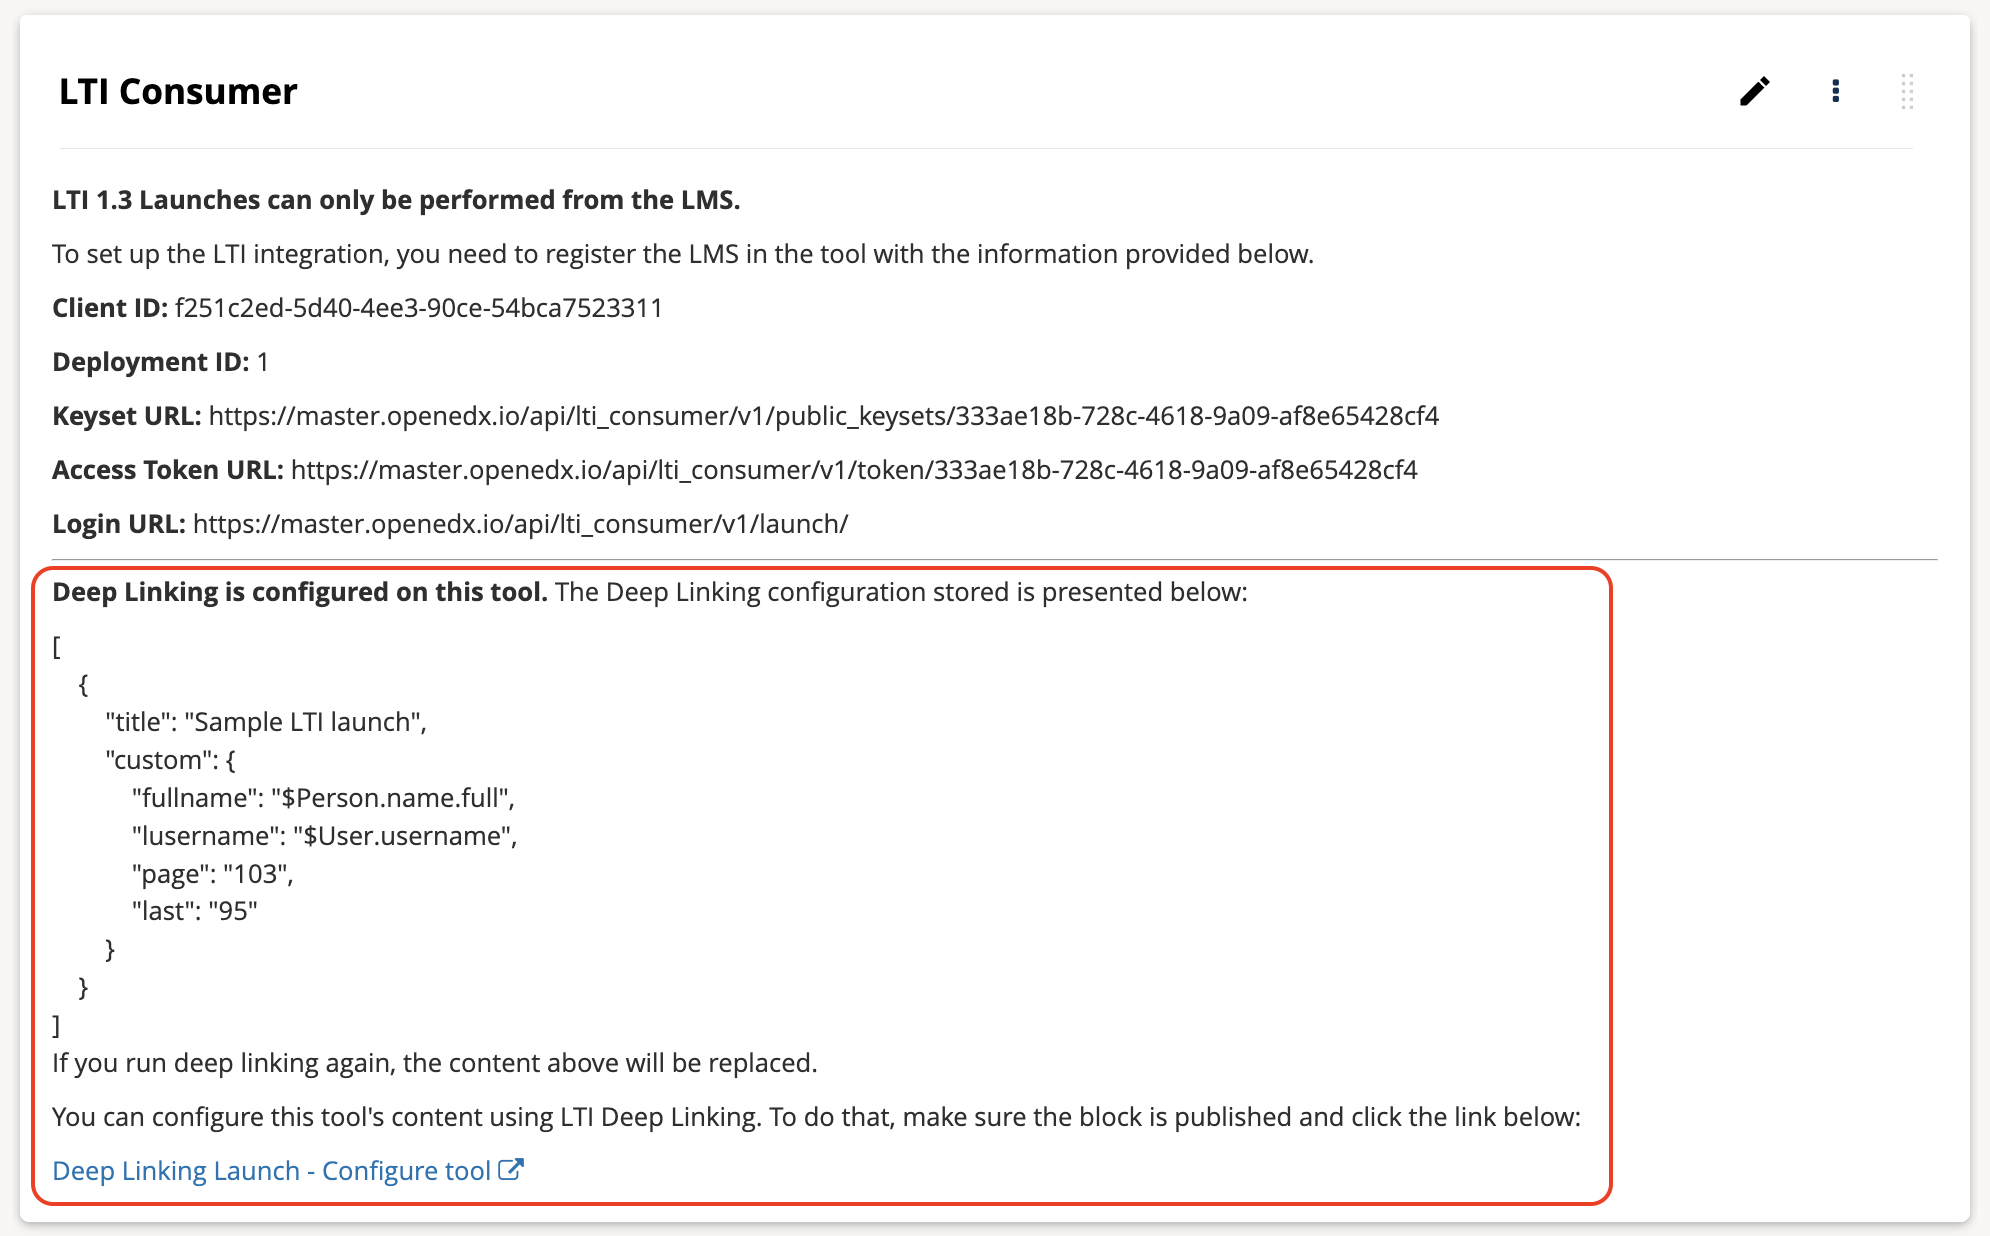
After Deep Linking succeeds, Studio displays the selected content configuration on the LTI Consumer XBlock.#
Publish and Test#
Publish the unit.
Open the unit in the LMS and launch the LTI tool as a learner and, if relevant, as staff or admin.
Confirm that the tool opens correctly and shows the content selected in deep linking.
If the component is graded, confirm that scores return to the Open edX platform as expected.
Note
LTI 1.3 launches work only with published blocks and only from the LMS, not Studio. Publish the unit before launching the tool.
See also
Set Up a Reusable LTI Store (site operator how-to)
Set Up an LTI 1.1 Component (how-to)
Set Up an LTI 1.3 Component (how-to)
LTI Advantage Services (reference)
Allow Sharing PII to LTI Components (reference)
Maintenance chart
Review Date |
Working Group Reviewer |
Release |
Test situation |
2026-06-25 |
Aamir Ayub |
Verawood |
Pass |
2025-12-05 |
LTI WG |
Ulmo |
Pass |