Quick Start: How to start translating for Open edX#
Welcome to the Quickstart guide for new Open edX translators. By the end of this tutorial, you will have completed all the steps necessary to begin submitting translations to the Open edX project.
Before you start#
This tutorial assumes the following:
You have signed up for a Transifex Signup account and have read through their getting started guide. For help getting started with Transifex, please review their Translating with the Web Editor page, and understand the roles and permissions as documented in Understanding User Roles. You will start off in the “Translator” role.
You have joined the Transifex Open edX project with the language(s) you wish to translate to.
You have to be fluent in both English and the language(s) you are translating to. You should have deep knowledge of English to be capable of translating phrases from the user interface and documentation. You should become a translator only if you feel you are capable of translating in both English and your target language. Open edX is written in English, so all translations are done from English to another language.
You have joined the Open edX Slack (https://openedx.org/slack) and Discourse (https://discuss.openedx.org). Translation help is available in the
#wg-translationsSlack channel!
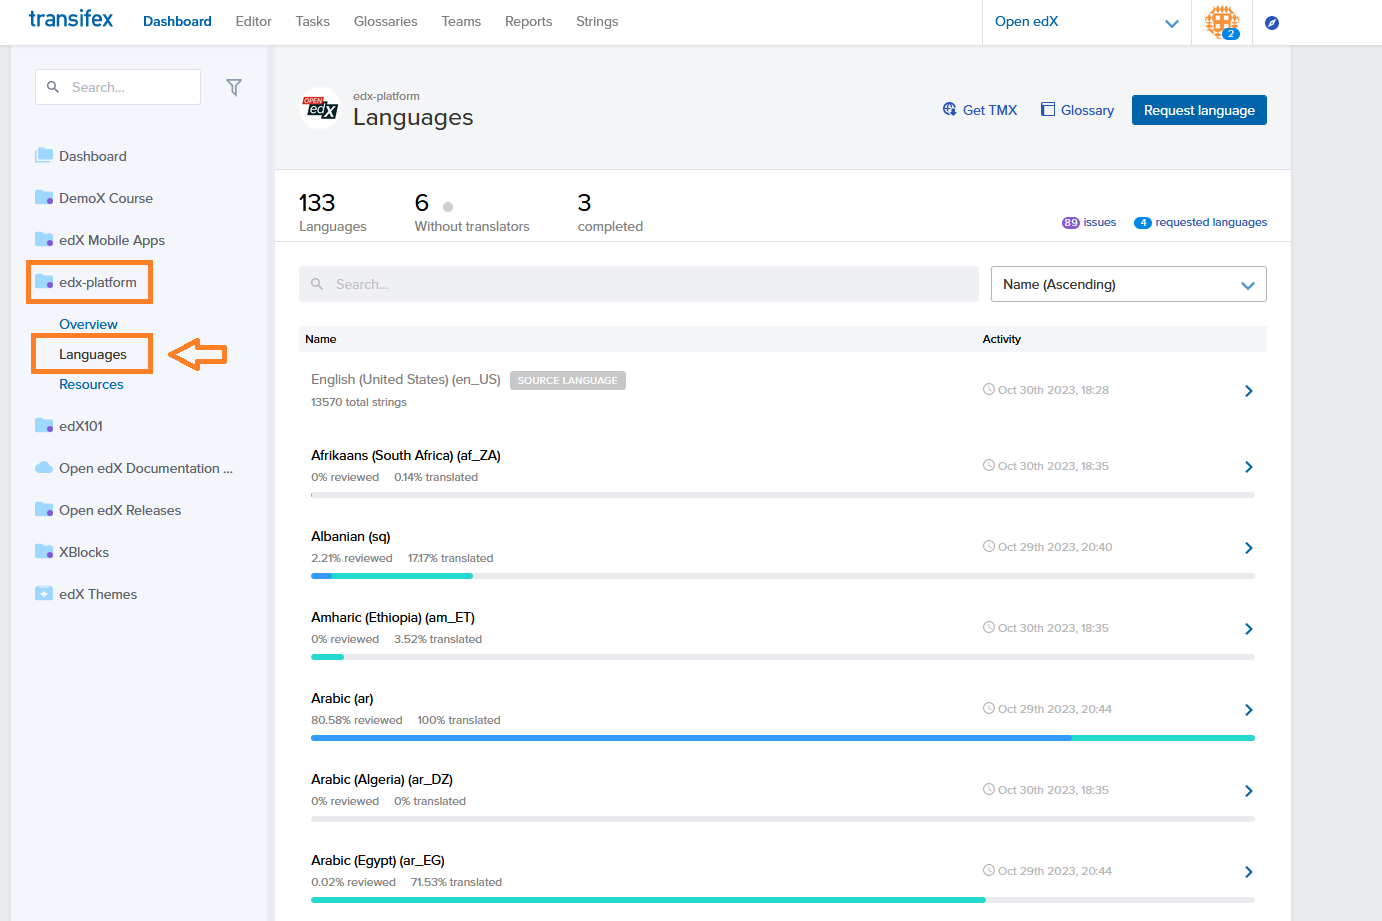
Finding a string to translate#
Once you have joined the openedx-translations project, you will be able to select the option “Languages” from the left hand menu under “openedx-translations”:
Select the target language that you wish to translate to:
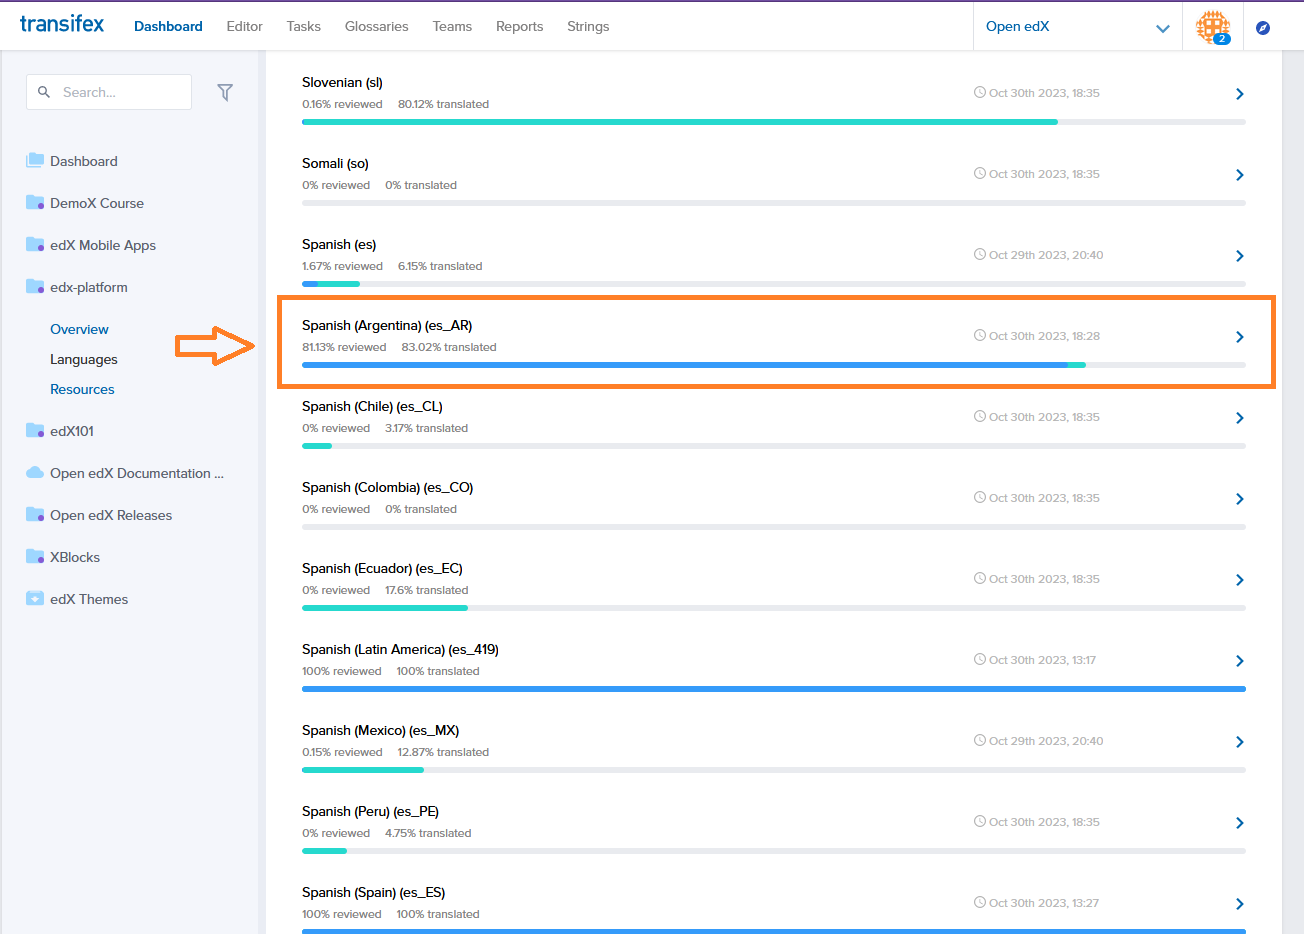
If you are allowed to translate for this language the “Translate” button at the top will allow you to click it. If you are unable to click the button you may need to wait for approval to join the translation team for this language before proceeding:
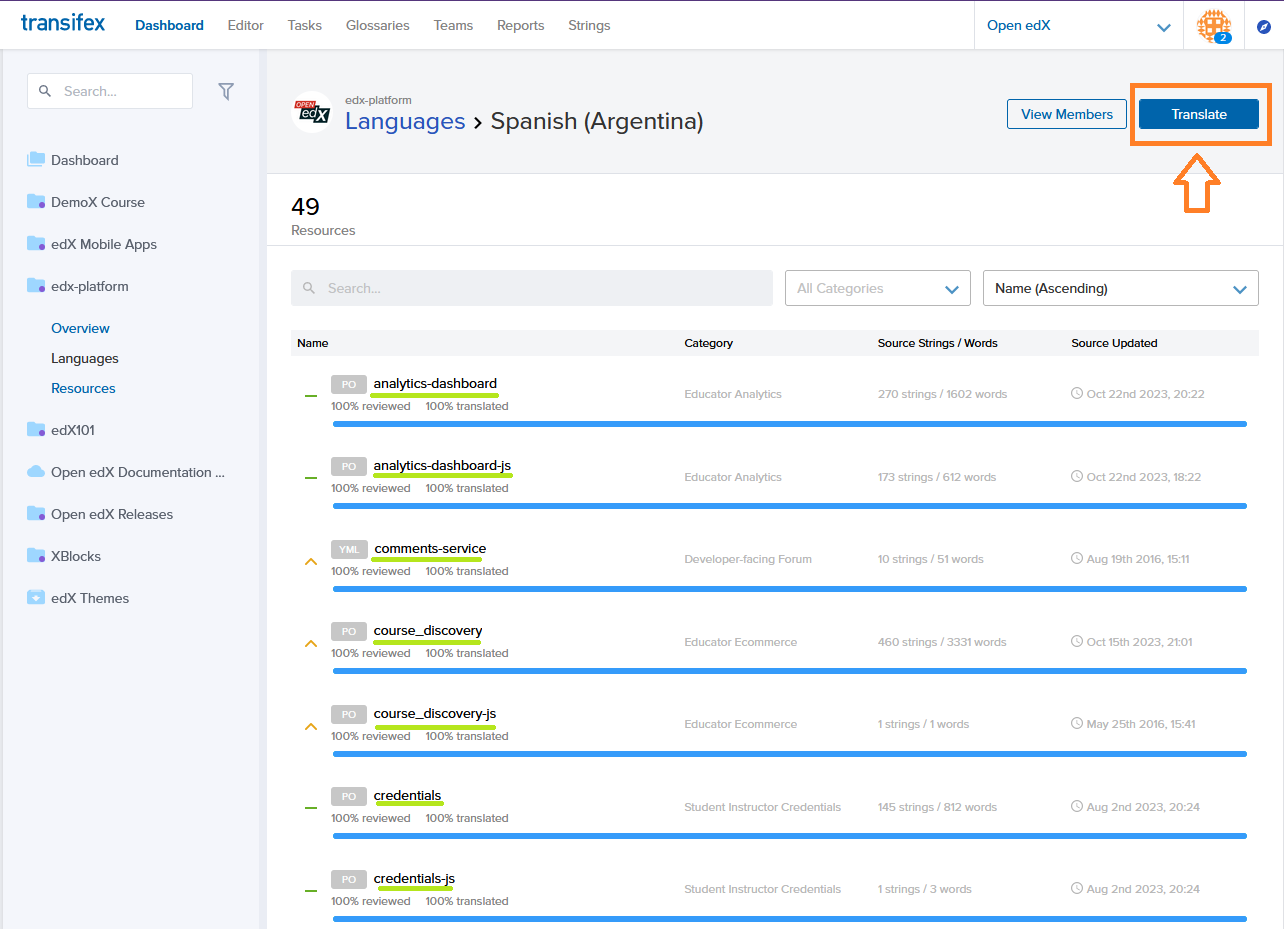
Select a resource
After you become a member of a translation team for a language, you can select any of the resources in the project to begin translating it:
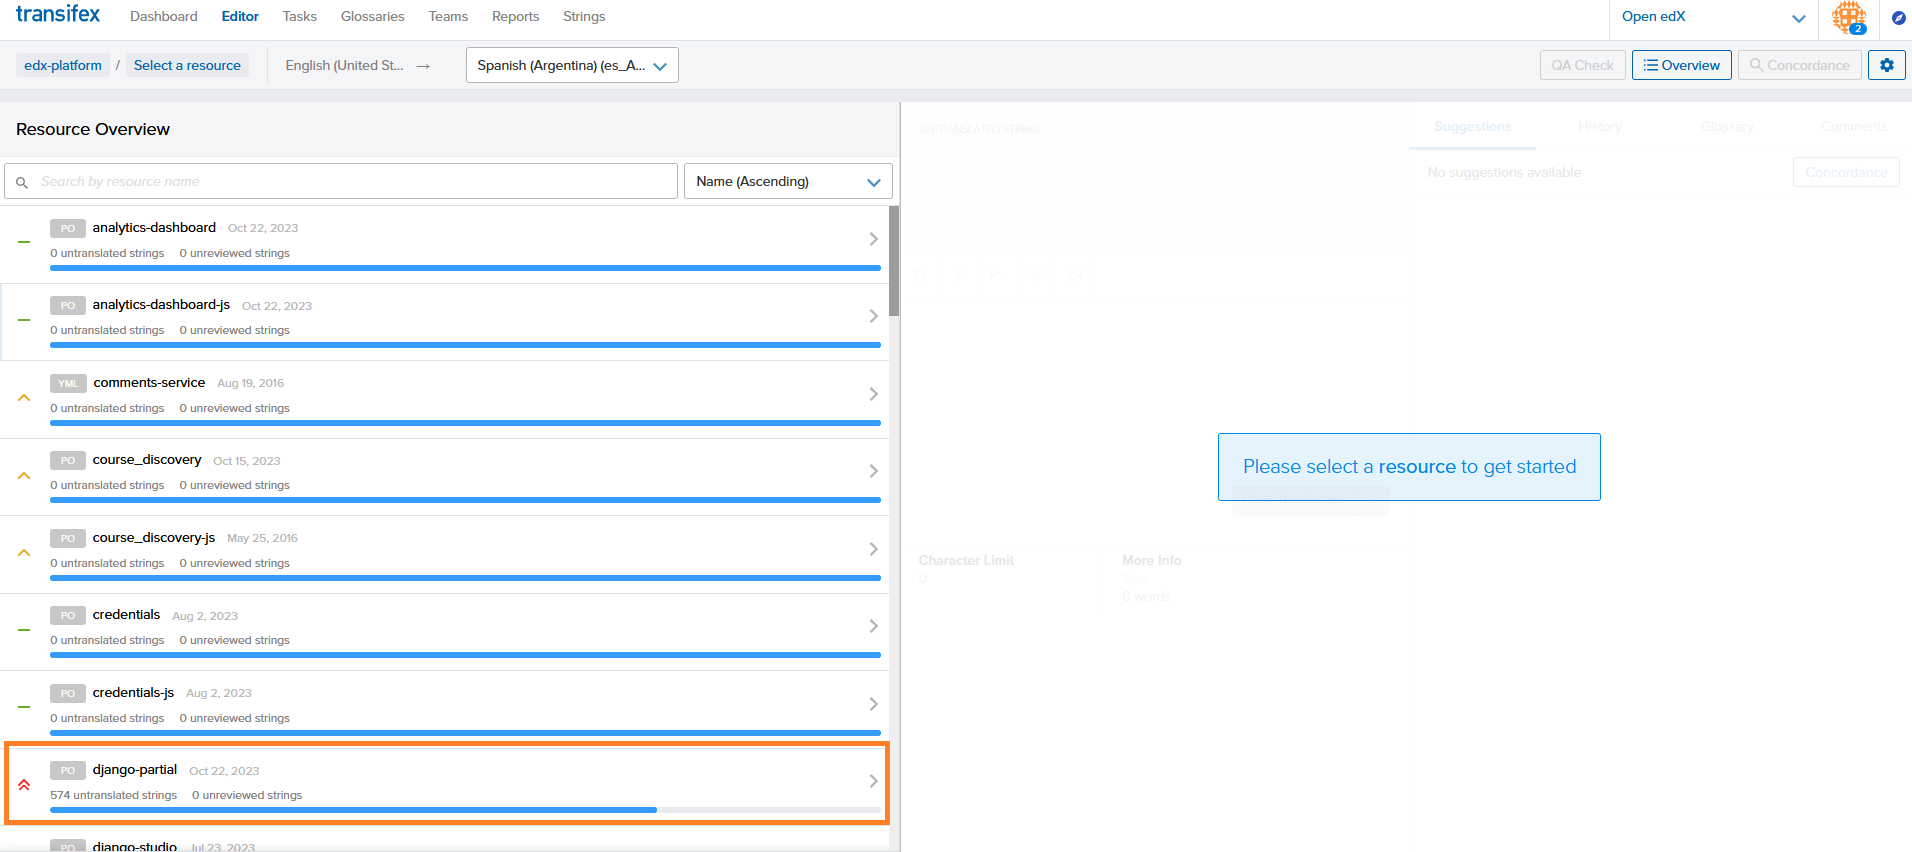
Translate a string
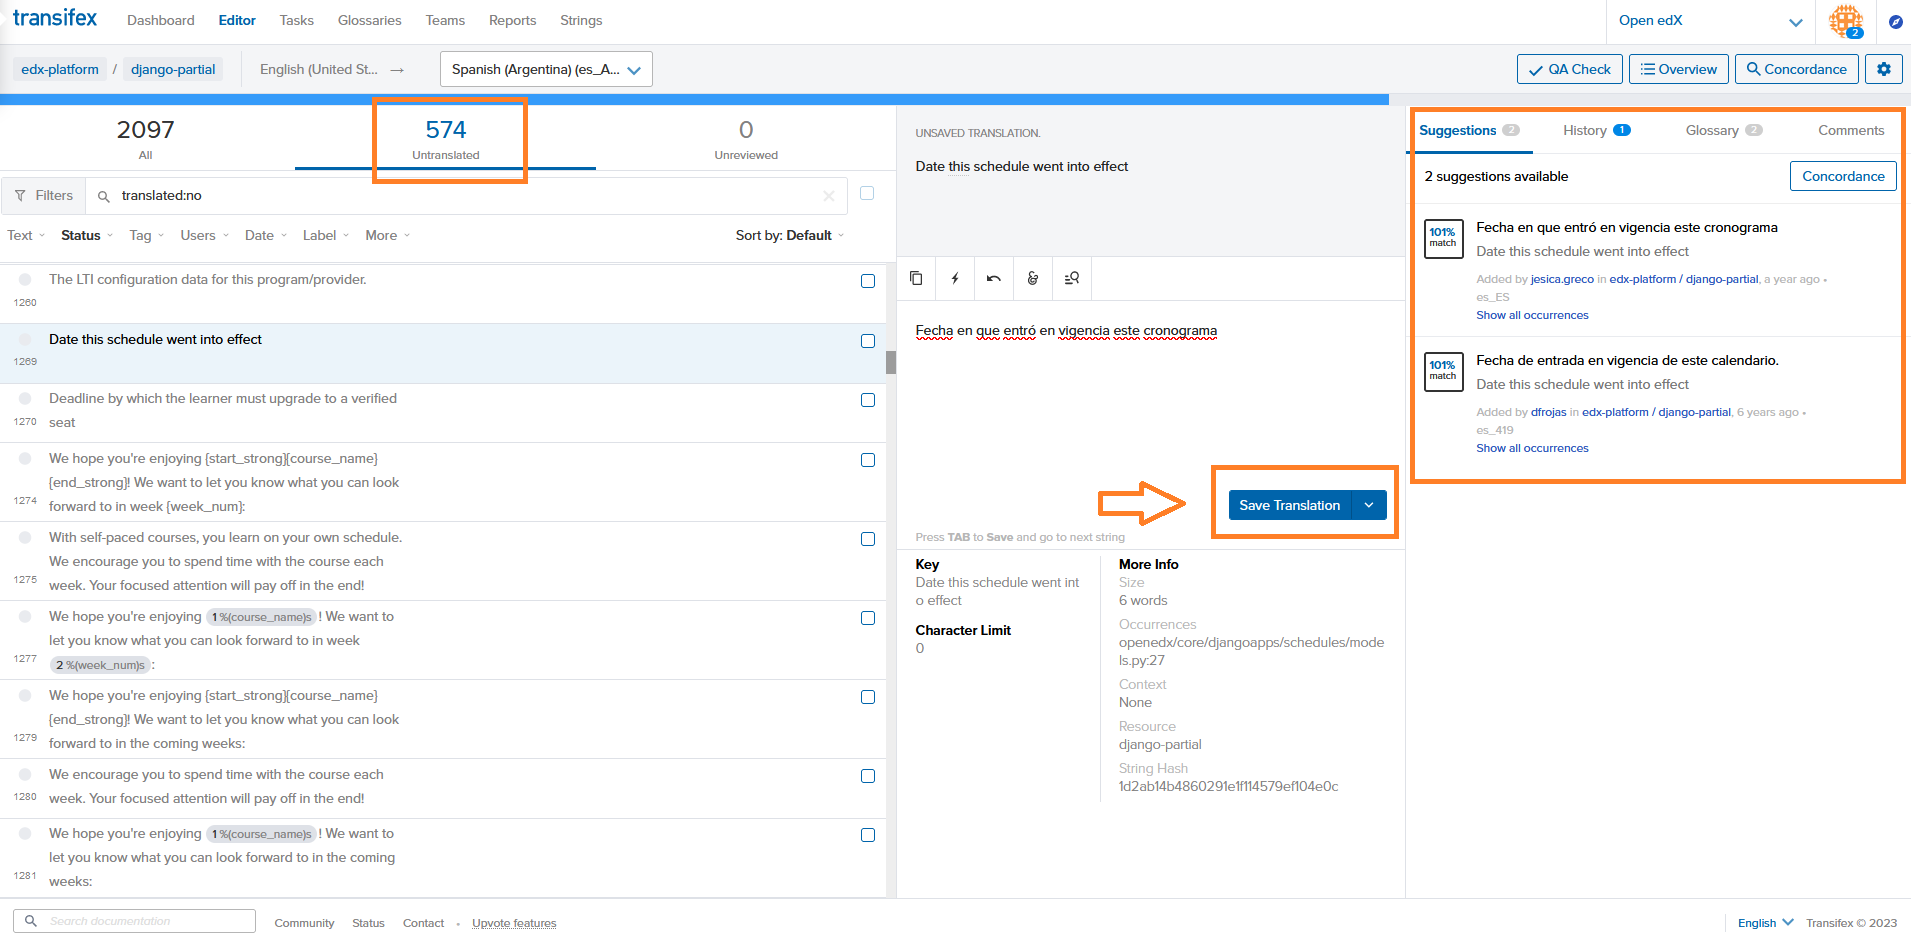
After you select a resource, you will see the number of untranslated and unreviewed strings. You can choose which string to translate and then click the button “Save Translation” after you have translated a string:
After saving your translation, there is a possibility to make a QA test by clicking the button “QA Check” on the right side of the screen:

When you click such button, there are three possibilities for checking your translation by opening LexiQA:
Perform Changes:
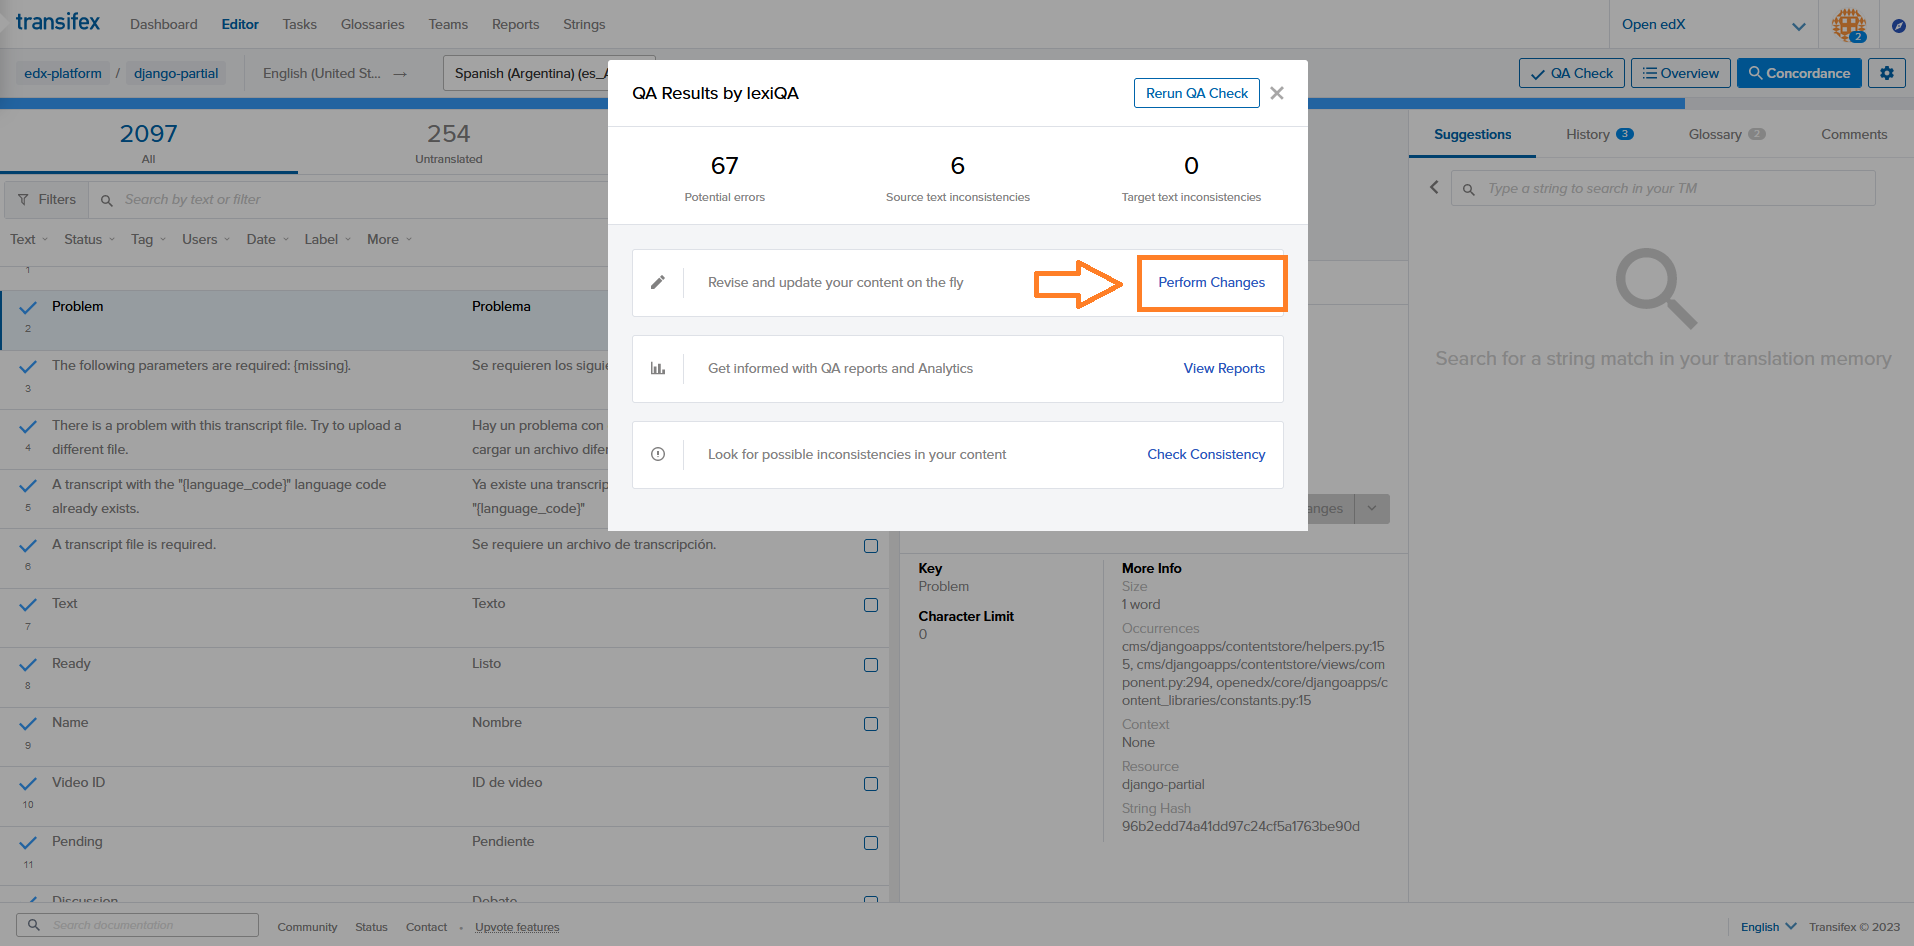
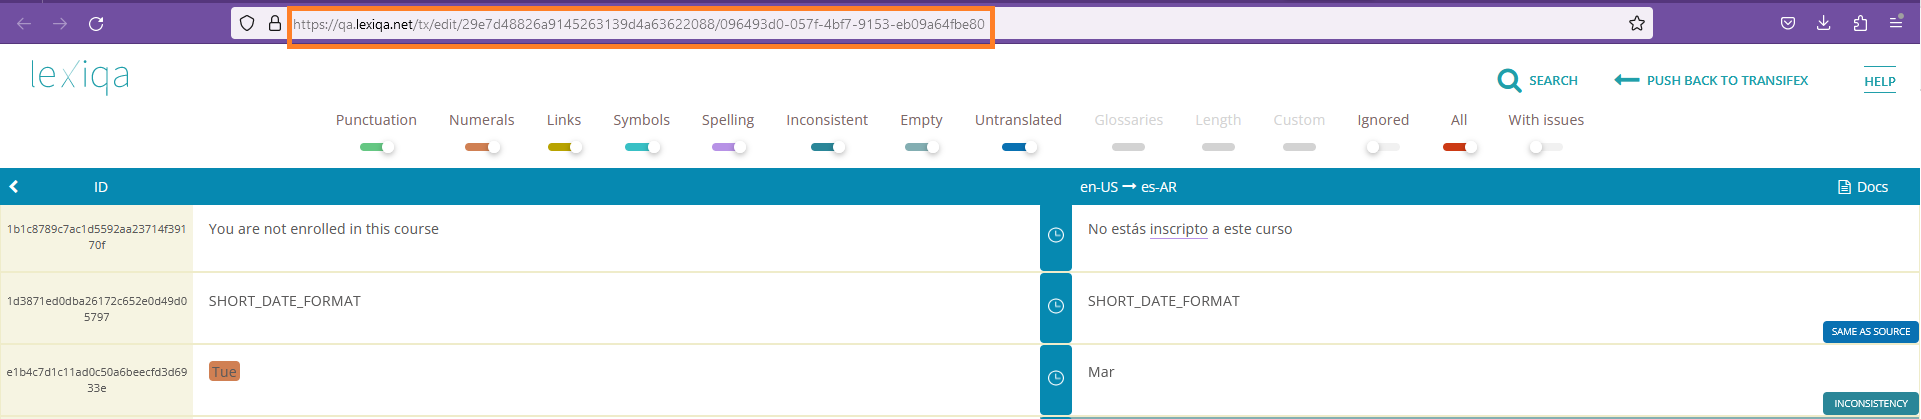
If you click the first option of this menu, it shows another screen detailing inconsistencies, or sentences/phrases same as source:
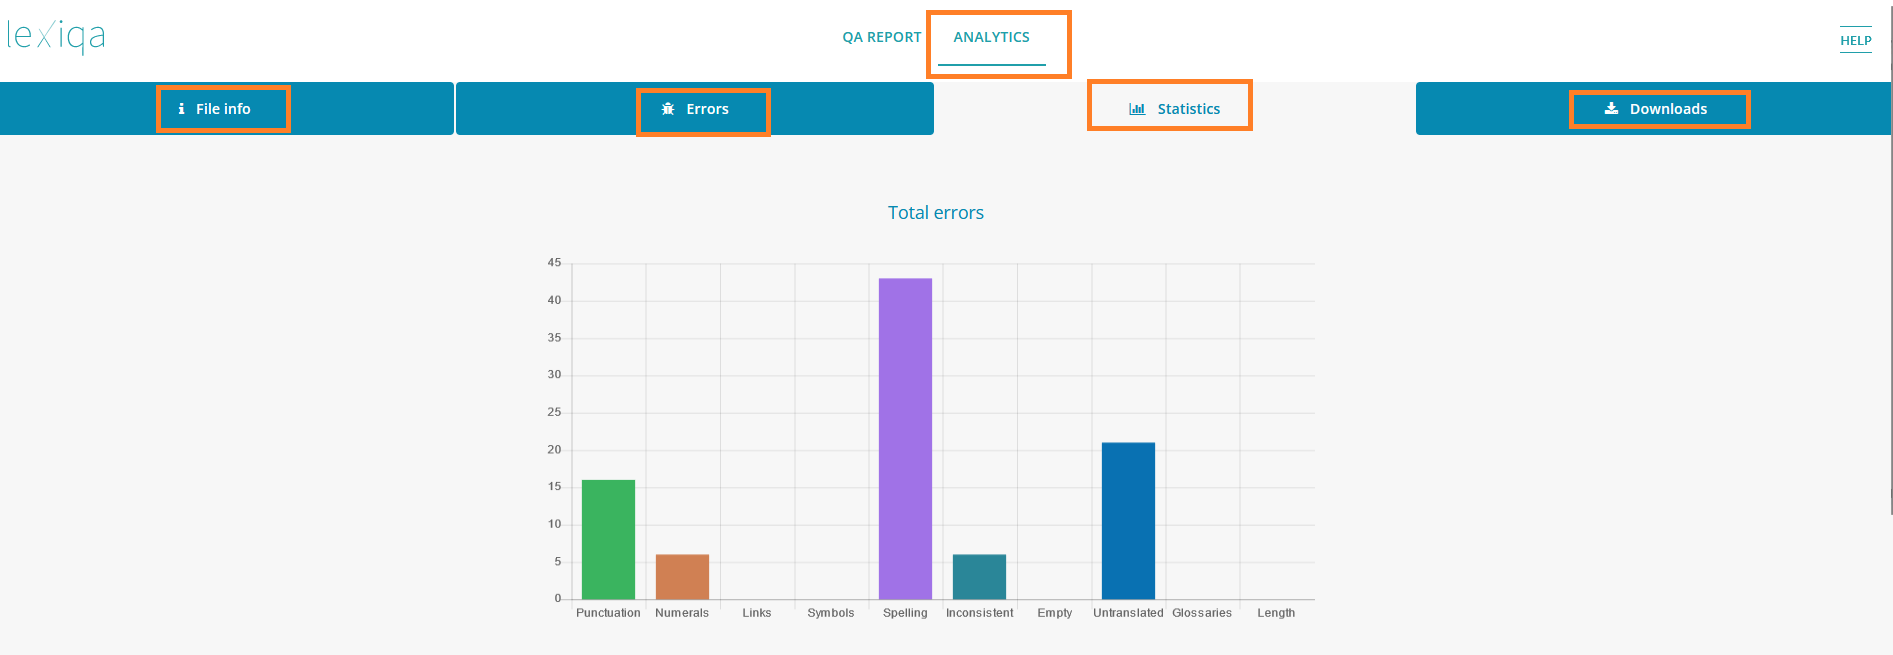
View Reports:

This option shows the same screen as below within LexiQA, and also another option called “Analytics”. Under such option, you can check the following data:
File info
Errors
Statistics (see picture below)
Downloads
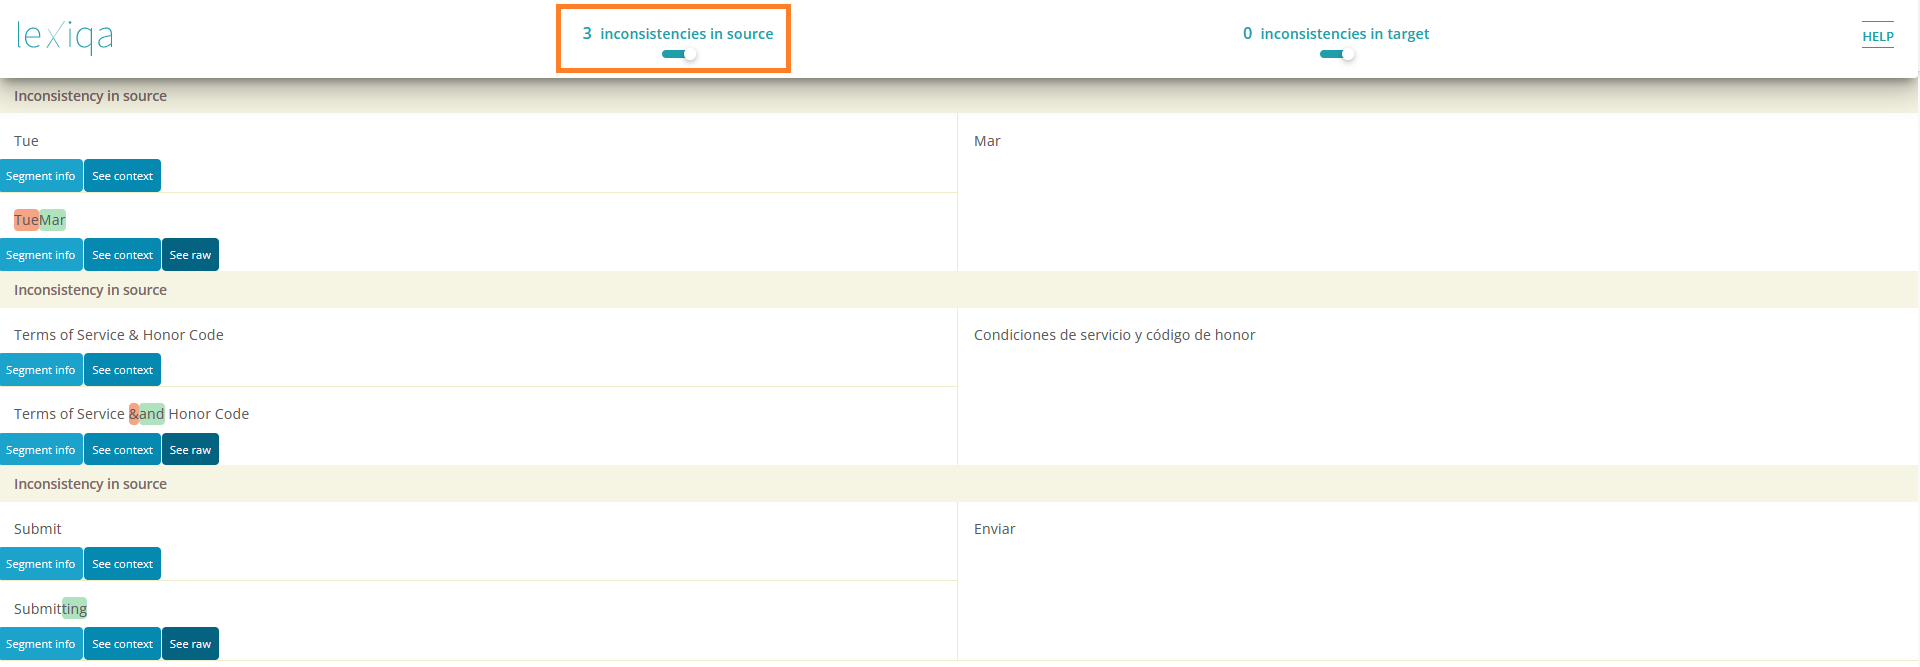
Check Consistency:
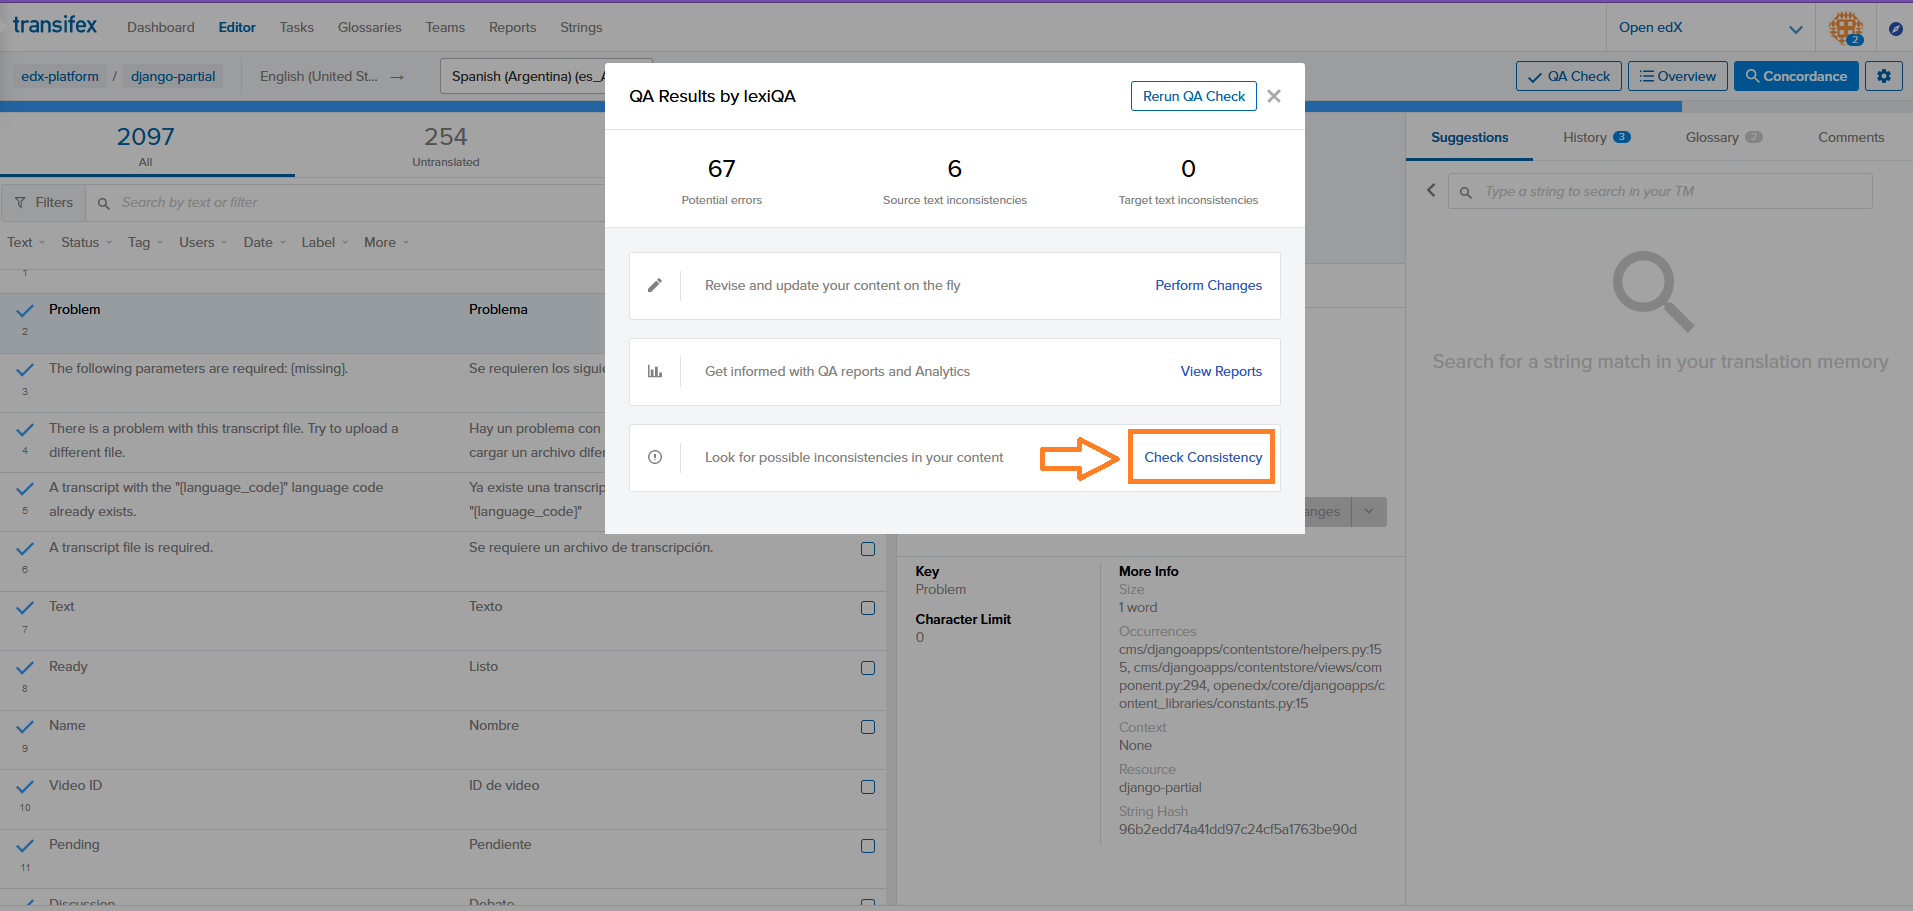
This option shows the amount of inconsistencies found comparing to the source text, so that you can edit your translation:
Details about how to translate things like HTML, placeholders, and other more complicate strings for Open edX are in the Translators: Concepts section.
Each language page lists a set of distinct resources to translate. A resource can be a Python and Django web service, a Javascript frontend, or even a single Javascript file. You should start by focusing on translating the non-Studio resources. That is, please first translate and review these resources, in this order, before anything else:
messages
mako
django-partial
djangojs-partial
wiki
notifier-django
comments-service
Only after the above resources are 100% translated and reviewed in your target language, move on to the Studio resources.
mako-studio
djangojs-studio
django-studio
Beyond those, it is best to ask what to work on next in Slack or Discuss to make sure your translations are as useful as possible to the community!
Translating#
Transifex’s Translating with the Web Editor page has details on how to use their tool to find and translate strings within a resource. Please use that as a guide to locate an simple untranslated string (something that is just a word or short phrase) that you feel confident in translating.
Select your string
Enter the translation in the center box
Press “Save Translation”
Your string is now ready for review! Every string must be reviewed and approved before it will be accepted into the official translations and released to the community.
Next Steps#
Learn more about how to translate different types of strings in Translators: Concepts
Become a reviewer to help the translation process move more quickly
Help keep this documentation up to date by submitting fixes or creating issues in the docs.openedx.org Github repository
Useful links#
Maintenance chart
Review Date |
Working Group Reviewer |
Release |
Test situation |